Spatial Points Data (CDT Station Format)
The menu allows to evaluate the performance of merged data performed with CDT, satellite rainfall estimates products and the output of climate models, and to evaluate the skill of a specific methods or parameters used for the bias adjustment or the merging. Here <name of the climate variable > is the precipitation data or other climate data such as the temperature, relative humidity, radiation, pressure or wind data. See the table of the computed validation statistics for more information.
The gridded data is first extracted at the station locations using before the computation of the validation statistics.
The tab Input allows to specify
the input station data used to validate and the extracted gridded data
at the station locations to be evaluated, and the folder to save the
output.
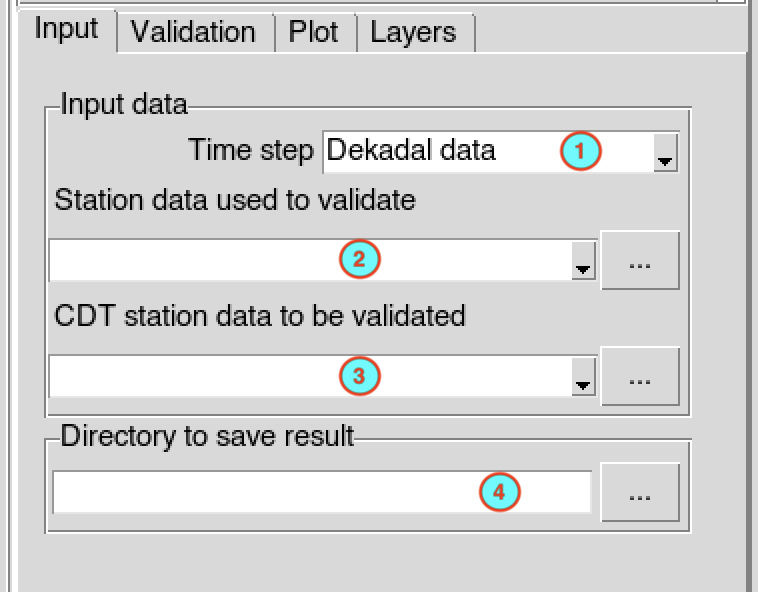
Select the temporal resolution of the data. Available temporal resolution are: daily, pentad, dekadal and monthly data.
Select the file containing the station data (in CDT station data format) used to validate from the drop down list if it is already loaded, or open it through
 .
.Select the file containing the station data (in CDT station data format) to be evaluated from the drop down list if it is already loaded, or open it through
.Enter the full path to the folder to save the output, or use the browse button
.
The tab Validation allows to
specify the season and the period over which the validation will be
performed, and the way the validation statistics will be computed.
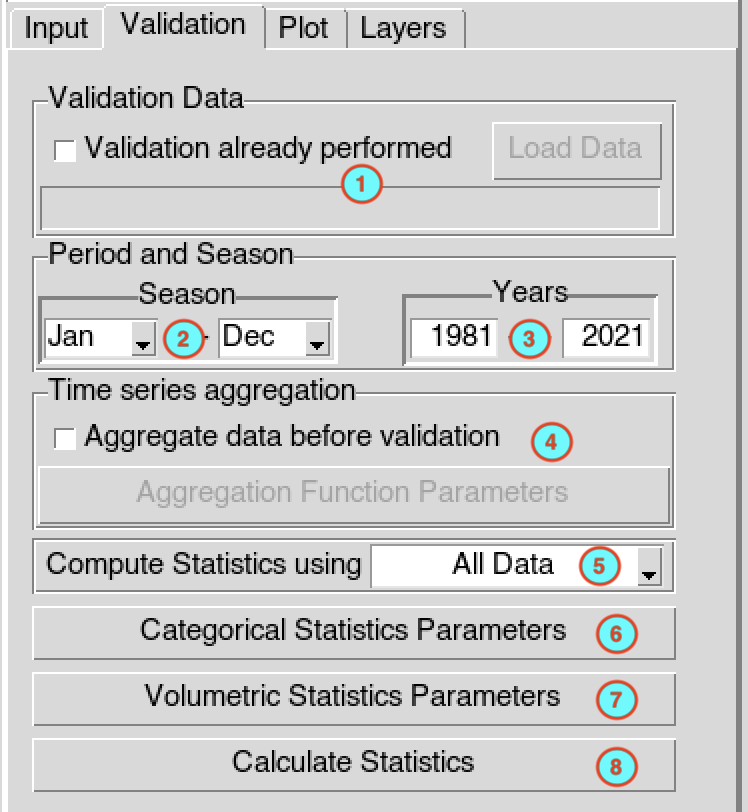
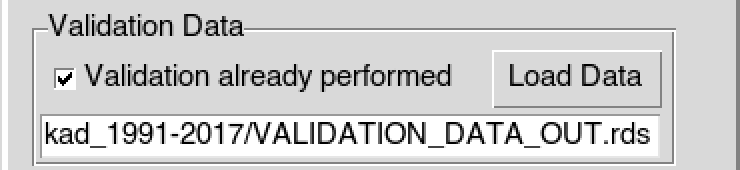
- If you already performed a validation and you want to display the
table of statistics, maps and graphs without providing again the input
data, you can check
 Validation already performed ,
it will activate the button allowing you to browse the file
VALIDATION_DATA_OUT.rds under the folder
VALIDATION_<name of the file containing the
station data used to validate> which is created under the folder
you provided to save the output.
Validation already performed ,
it will activate the button allowing you to browse the file
VALIDATION_DATA_OUT.rds under the folder
VALIDATION_<name of the file containing the
station data used to validate> which is created under the folder
you provided to save the output.
Select the months or the season you want to include in the validation process. For example, if your input data is a daily rainfall and you want to perform the validation with the seasonal rainfall total of the rainy season.
Provide the start and end year of the period over which the validation will be performed.
If you want to aggregate the data before performing the validation, check the box
Aggregate data before validation
, it will activate the button allowing you to select the
function to use to aggregate the data and to set the minimum number of
observations to compute one output time step. See Aggregation parameters
to set the parameters in the dialog box.Select the method to transform the data before computing the validation statistics. Available methods are: All Data, Spatial Average and Each Station.
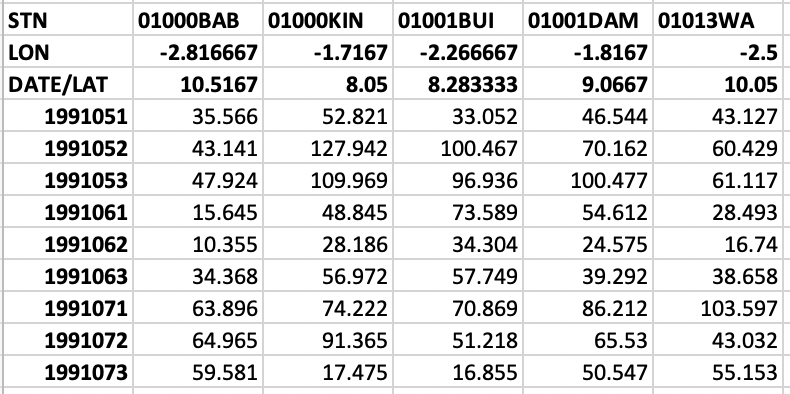
Suppose you have the CDT station format data to be used to validate (station-observation) and to be validated (gridded-extracted) as follow
station-observation gridded-extracted 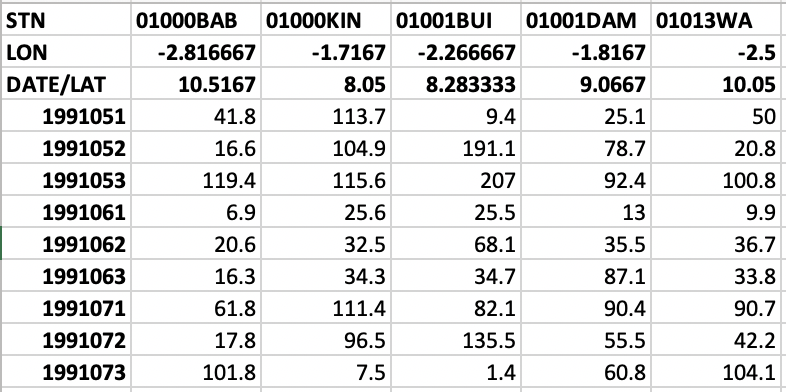
All Data: the validation statistics are computed from two series obtained by
concatenating the data of all stations from station-observation and gridded-extracted respectively. The data of the stations becomestation-observation gridded-extracted 

Spatial Average: the validation statistics are computed from two series obtained by spatially averaging station-observation and gridded-extracted respectively. The data would be as follow
station-observation gridded-extracted 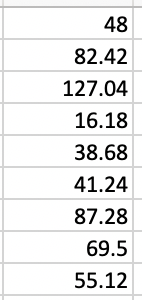
Each Station: the validation statistics are computed for each pair of series constituted by the station from station-observation and gridded-extracted respectively.
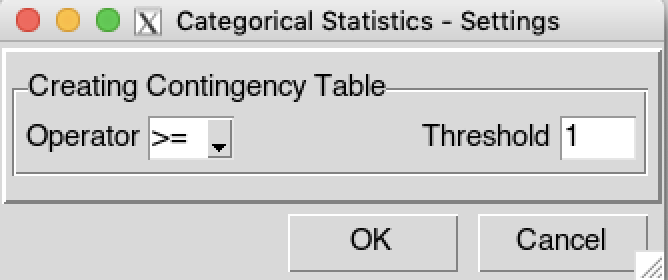
To create the contingency table to be used to compute the categorical statistics, click on button. It displays a dialog box allowing you to select the operator to be applied and the the threshold to be used.
In case of precipitation data, click on button to set the parameters to use to compute the volumetric statistics. It displays a dialog box allowing you to specify the threshold to be used.
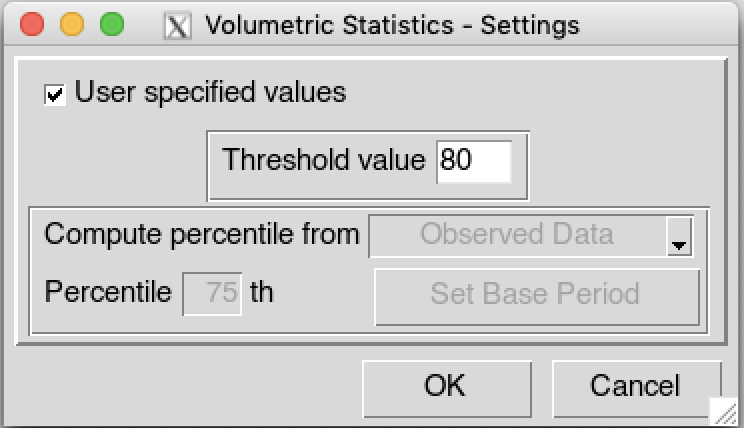
If you want to use a specific threshold above which the statistics will be computed, check the box
User specified values .
If you selected All Data or Spatial Average as method used to transform the data, enter the value of the threshold to be used.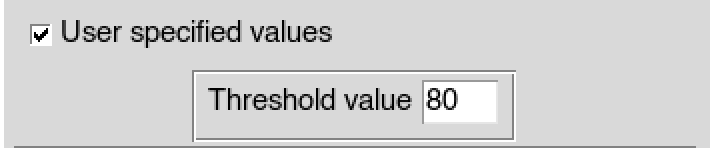
In case of Each Station, if you want to use a unique threshold for all stations, check the box
Use a unique threshold value
then enter the value of the threshold to be used.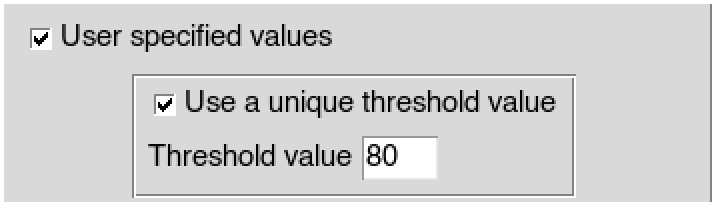
If you want to use different threshold for each station, uncheck the box
Use a unique threshold value
and select or open the file containing the threshold values.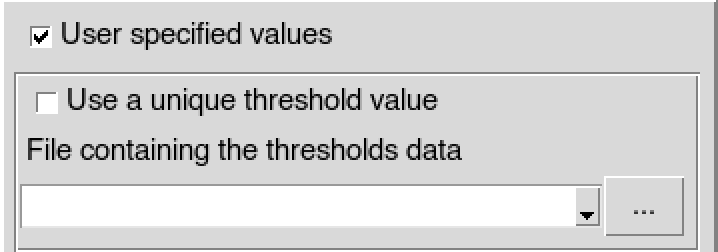
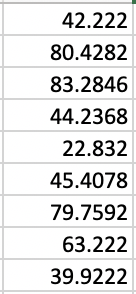
The threshold data must be in CDT station format, the number and order of the stations have to be the same as the station observation used to validate (station-observation). It may be a percentile data already computed or any threshold values you want. Below is an example of the threshold data related to the example provided above.

If you want to use a thresholds using a percentile computed from the input data (observed or estimated data),
uncheck the box User specified values , then
select the source of data you want to compute the percentile:
Observed Data or Estimated Data, and enter the
percentile to be calculated.
In case of Spatial Average and Each Station, specify the base period over which the percentile will be calculated by clicking on the button .
Click the button to compute the validations statistics.
A folder named VALIDATION_<name of the file
containing the station data used to validate> is created under
the folder you provided to save the output. It contains the file
VALIDATION_DATA_OUT.rds and two folders
OBS_GRD_DATA and STATISTICS_DATA
- OBS_GRD_DATA: contains 2 files, the observed data used to validate Observations.csv the gridded data extarcted at the station locations Gridded_at_Obs_Loc.csv.
- STATISTICS_DATA contains 3 types of files in the
form
All_Data_Statistics_<temporal resolution>_<moths or season>_<period>.csv: contains the statistics computed using All Data method.
Spatial_Average_Statistics_<temporal resolution>_<moths or season>_<period>.csv: contains the statistics computed using Spatial Average method.
Stations_Statistics_<temporal resolution>_<moths or season>_<period>.csv: contains the statistics computed using Each Station method.
Where <temporal resolution> is one of daily, pentad, dekadal, monthly or seasonal; <moths or season> the months or season used to compute the statistics; <period> the period over which the statistics were computed.
The tab Plot allows to display a table and map of the validation statistics, a scatter plot and a cumulative distribution function (CDF) curves.
If the validation statistics have been computed with All Data and Spatial Average, you can display the table of statistics, a scatter plot and CDF curve.
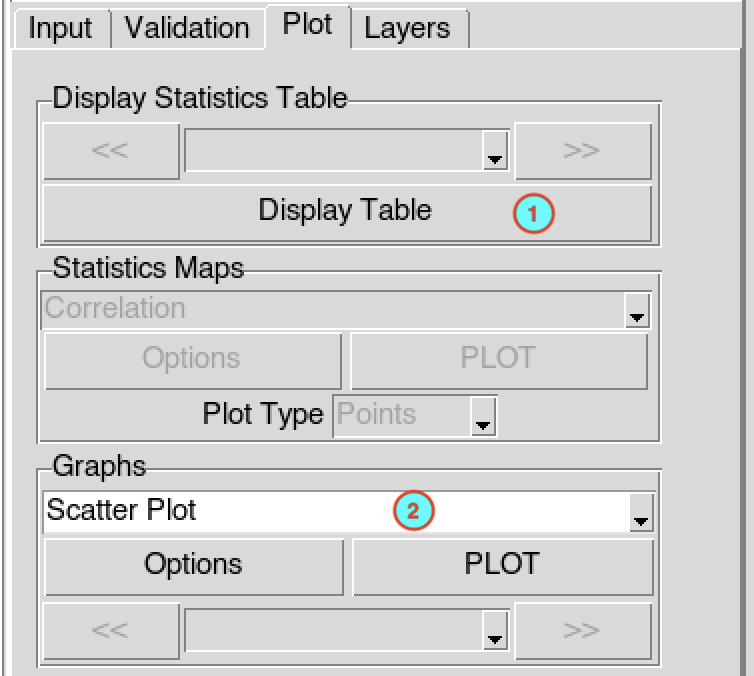
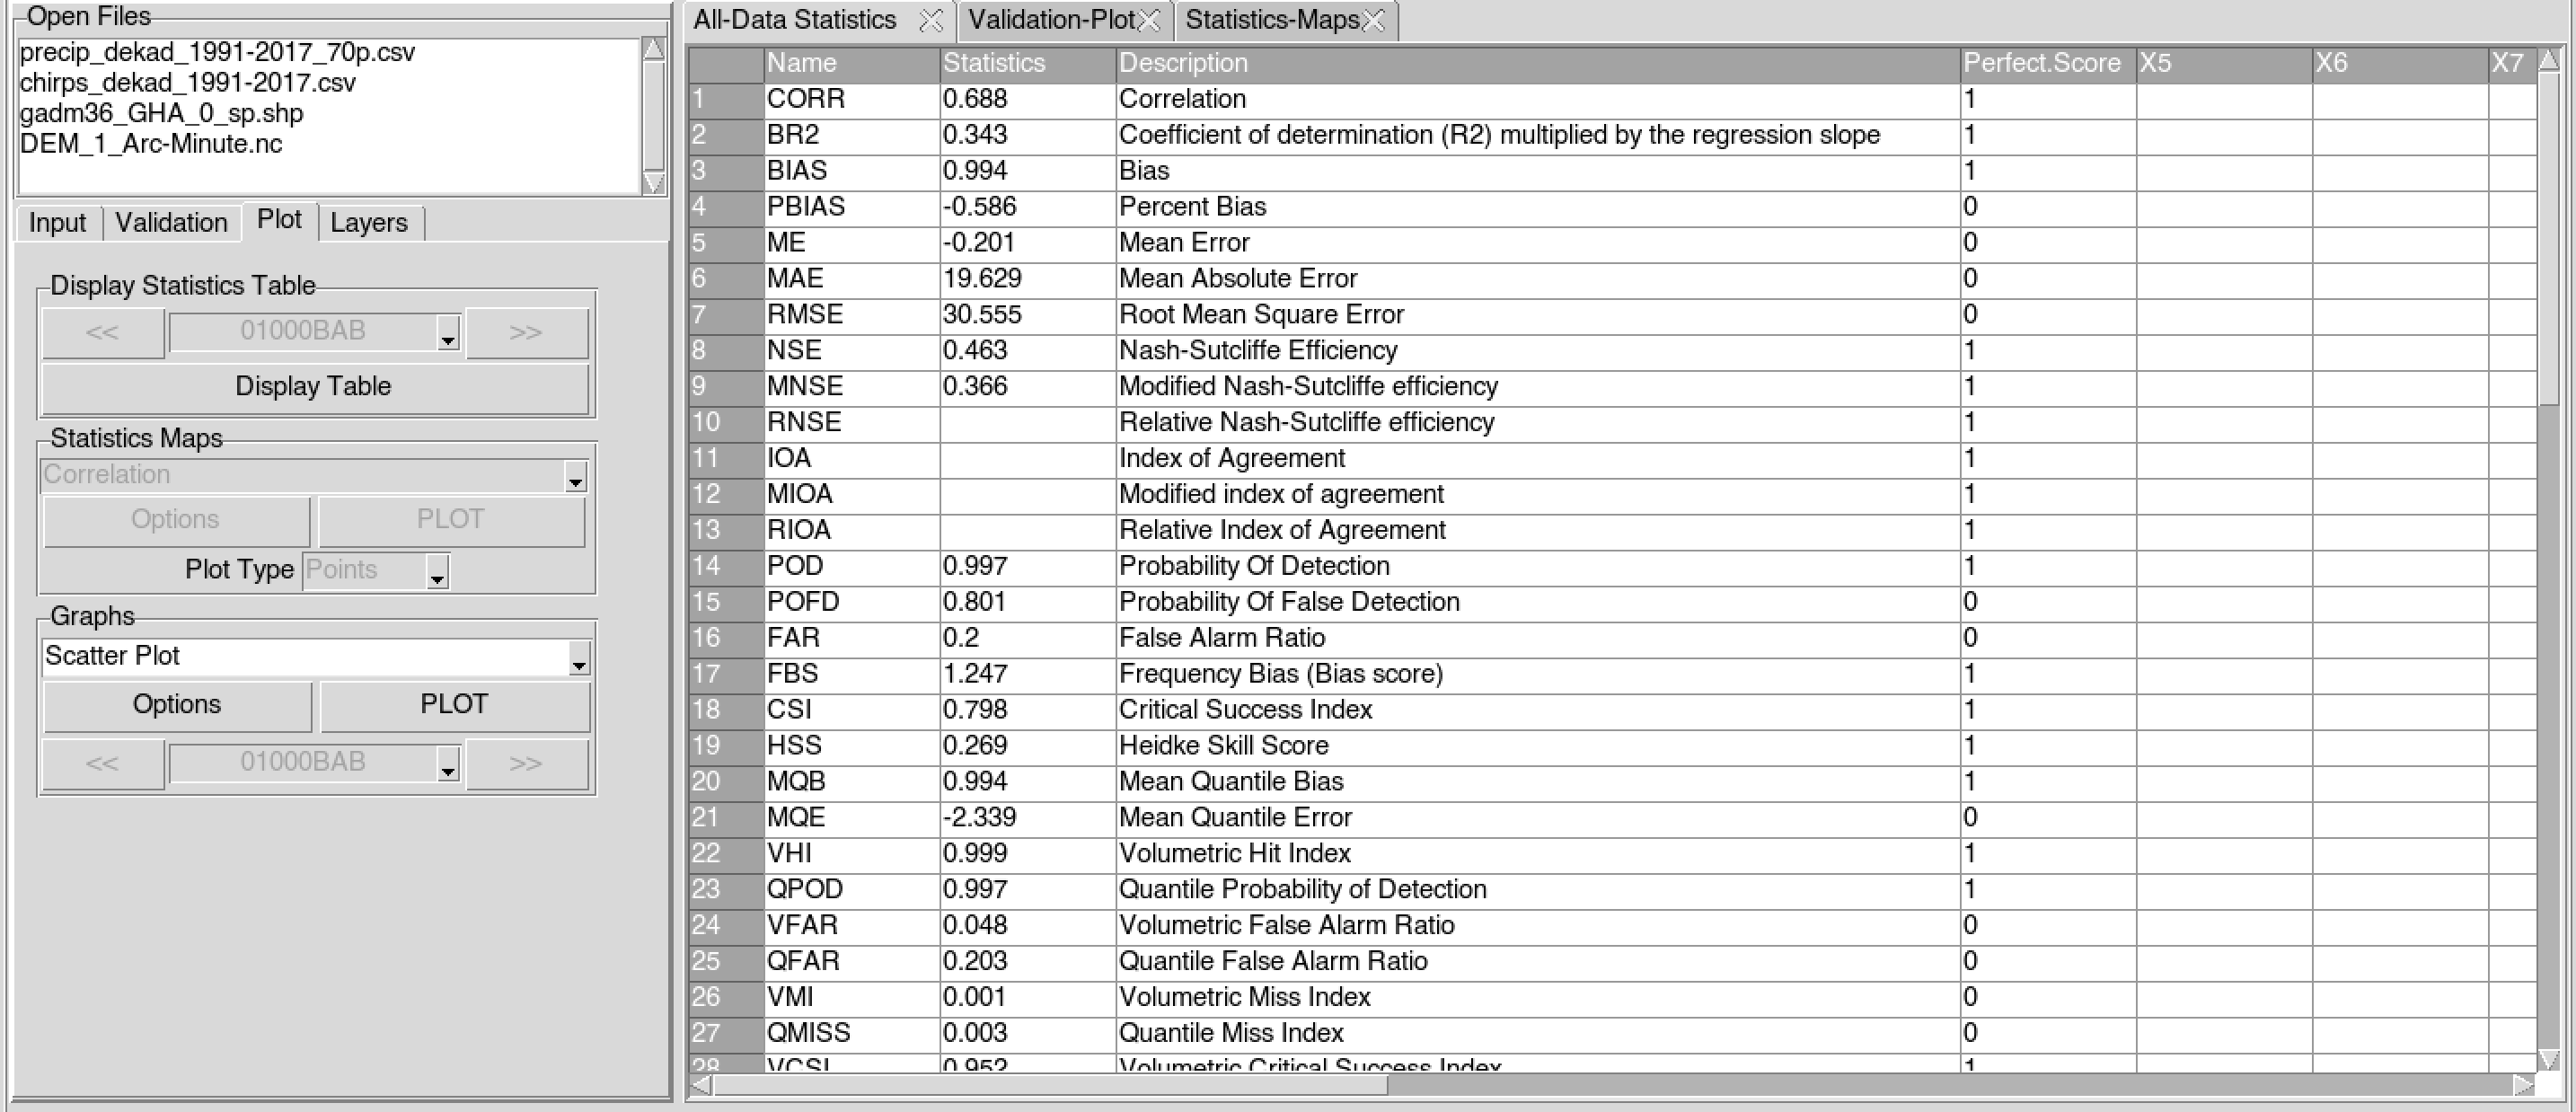
- Click on button to display the table of statistics. See the list of available validation statistics here.
- You can display the scatter plot or the CDF curve of the data, by selecting here the type of data to display then clicking on the button .
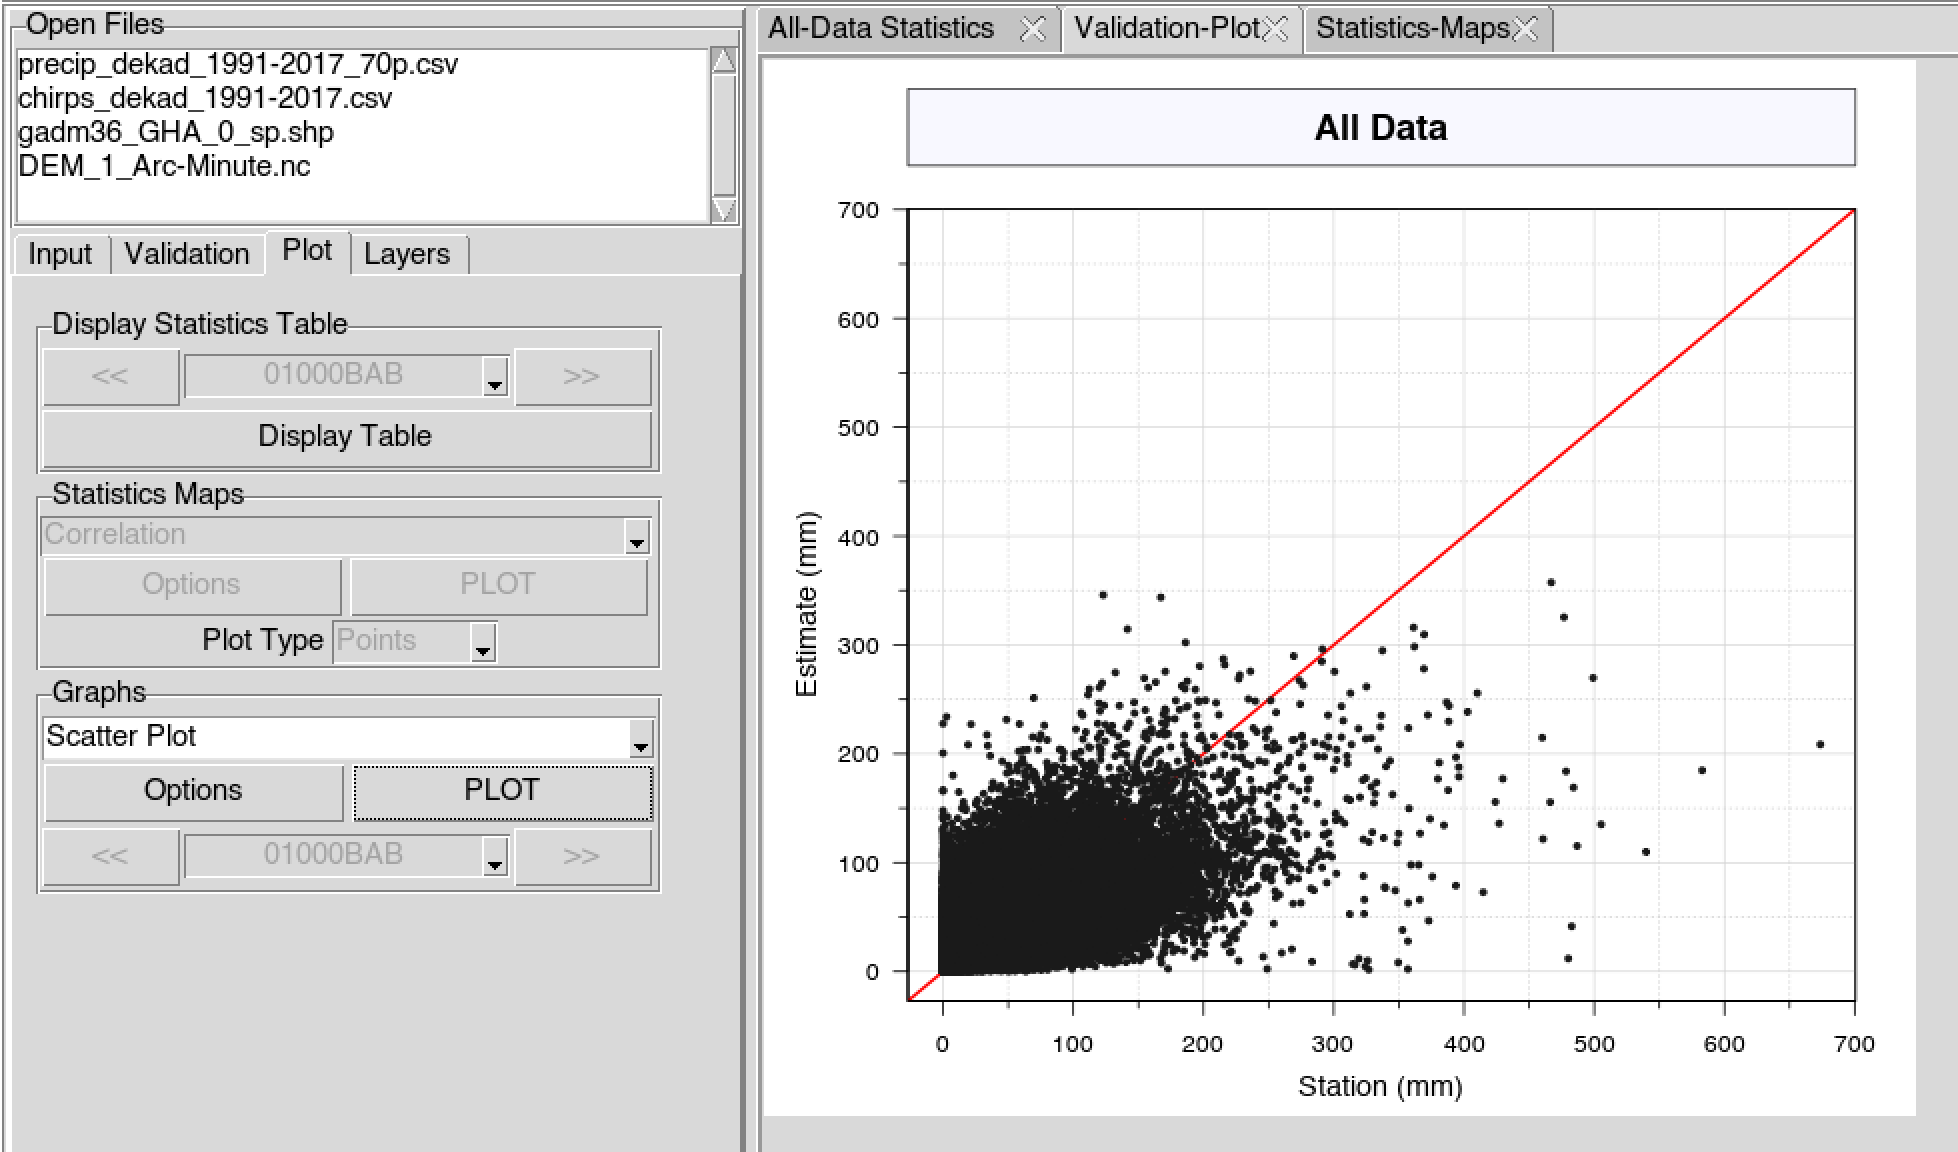
Scatter plot
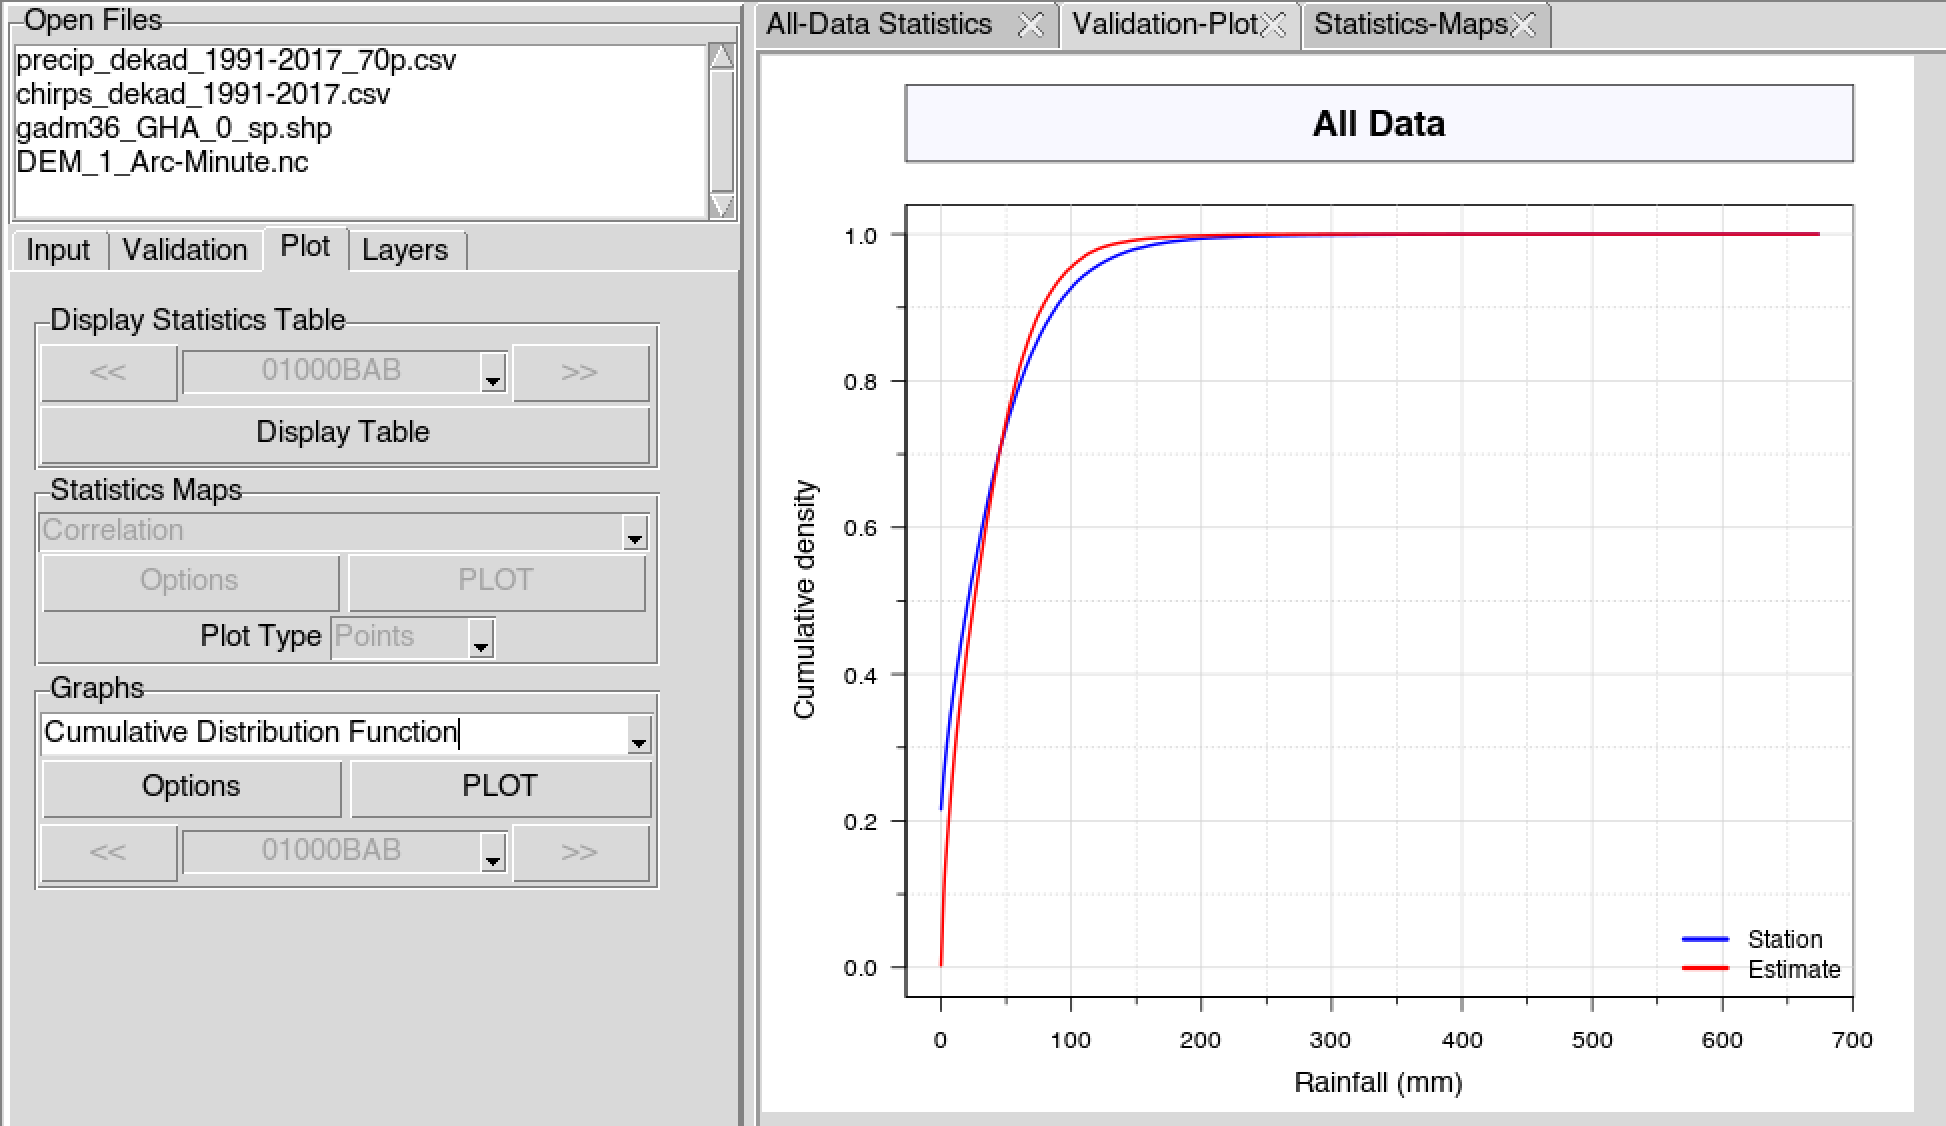
Cumulative distribution function curve
In case of Spatial Average, you also can display a chart of the observed and the estimated data by selecting Line chart.
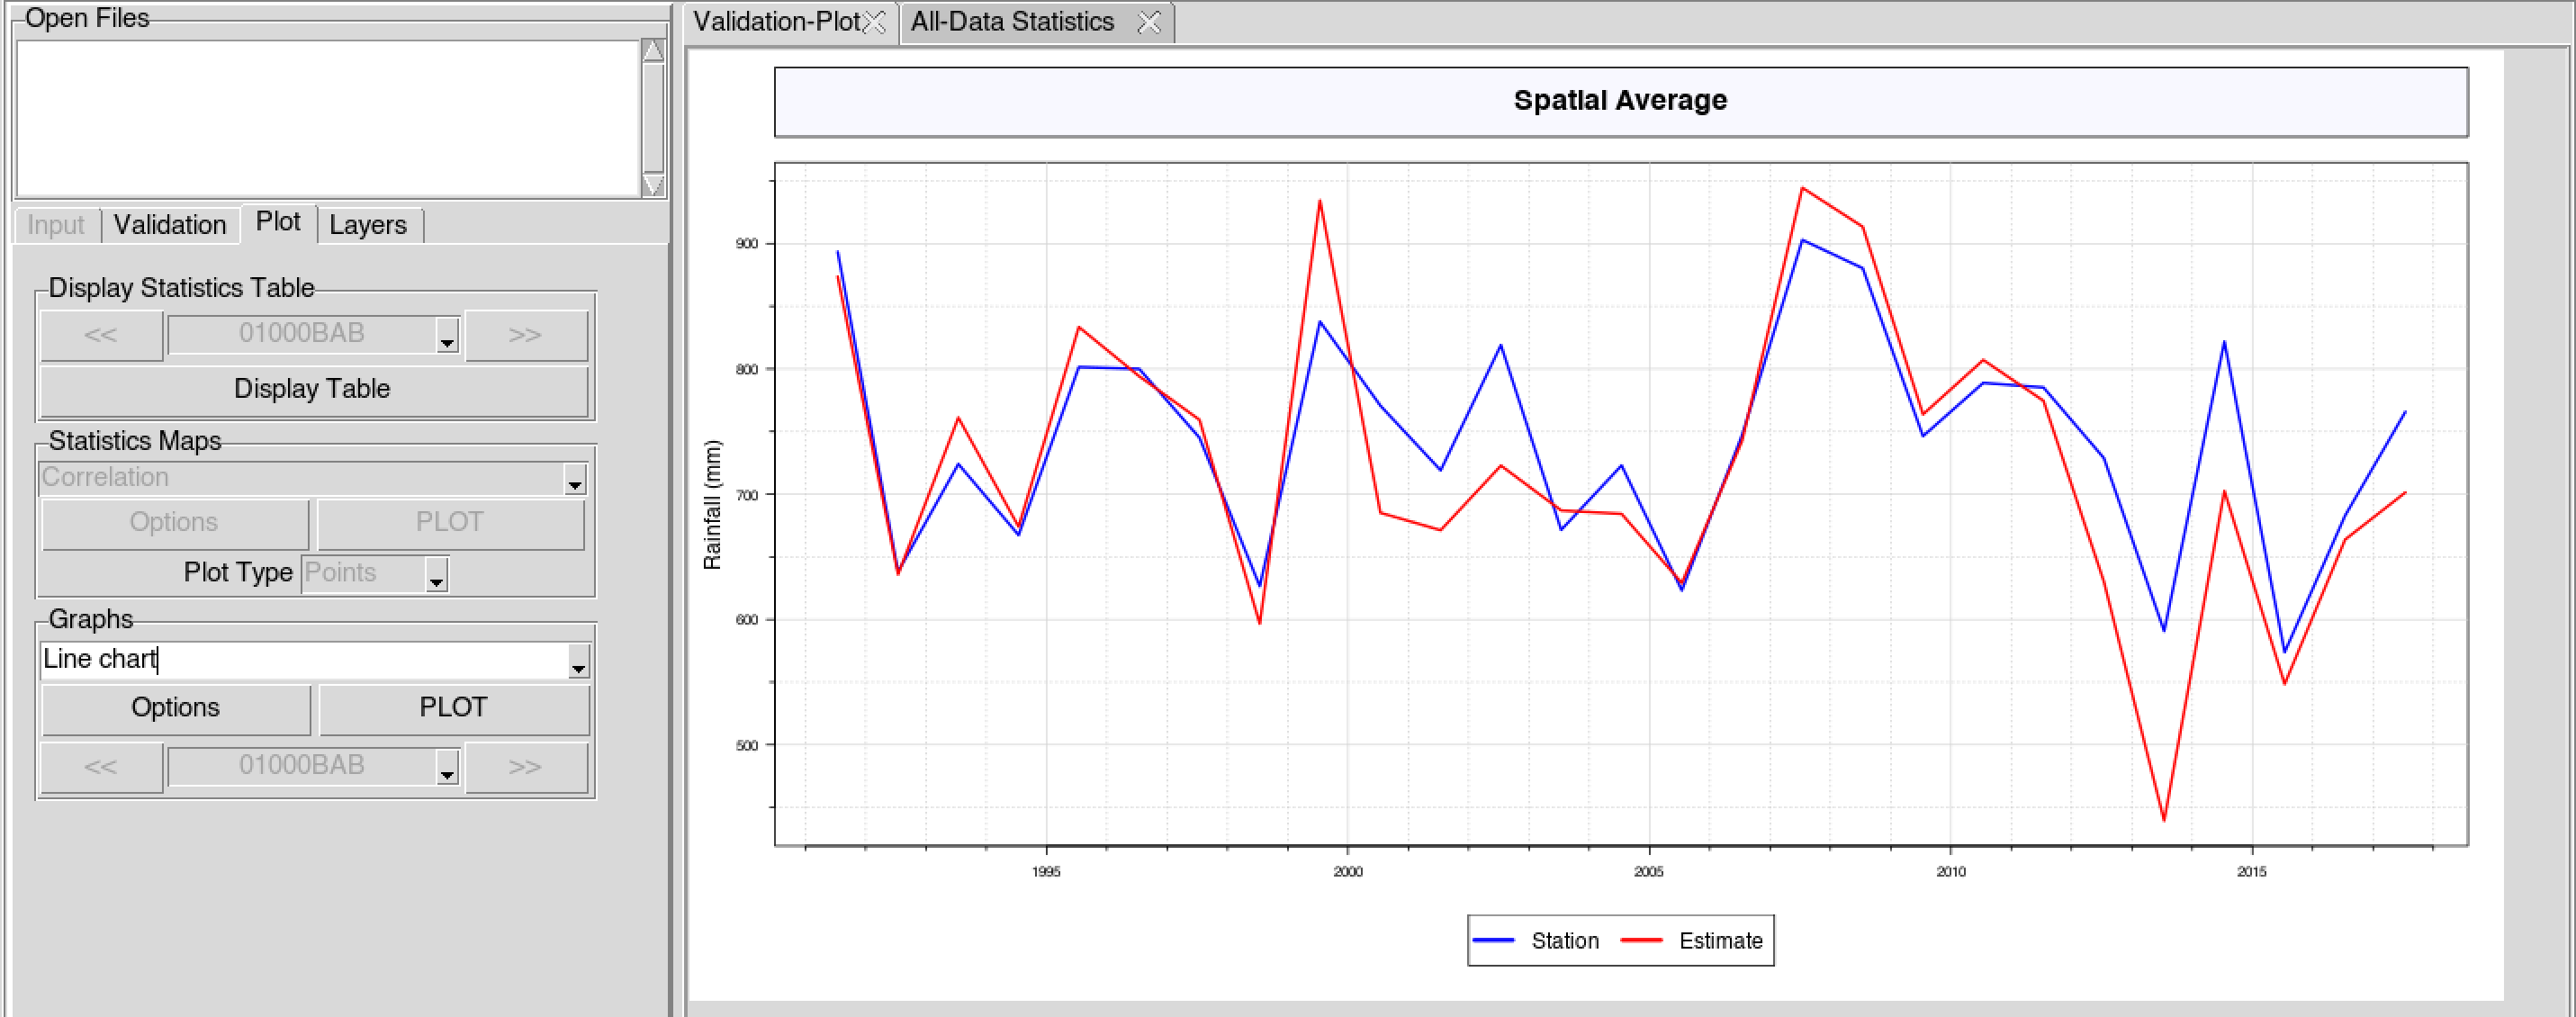
Line chart
Click on the button to change the range of the x and y axis, to add labels and legends, to change the title, and to change the type and color of the plot. The options dialog box for Scatter Plot can be found here, and for Cumulative Distribution Function and Line chart options dialog box are here.
If the validation statistics have been computed with Each
Station, you can display the table of statistics for each
station; the map of all statistics; and a scatter plot, CDF curve and
line for each station.
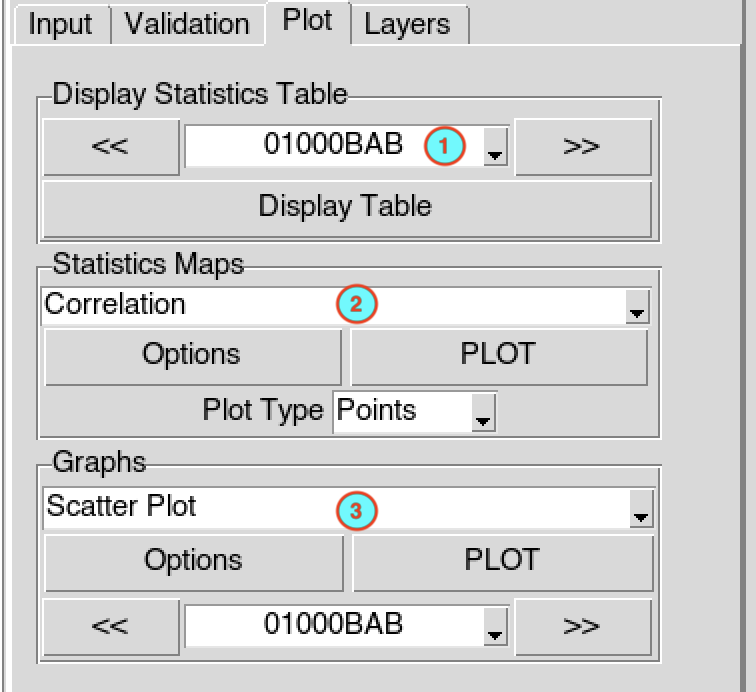
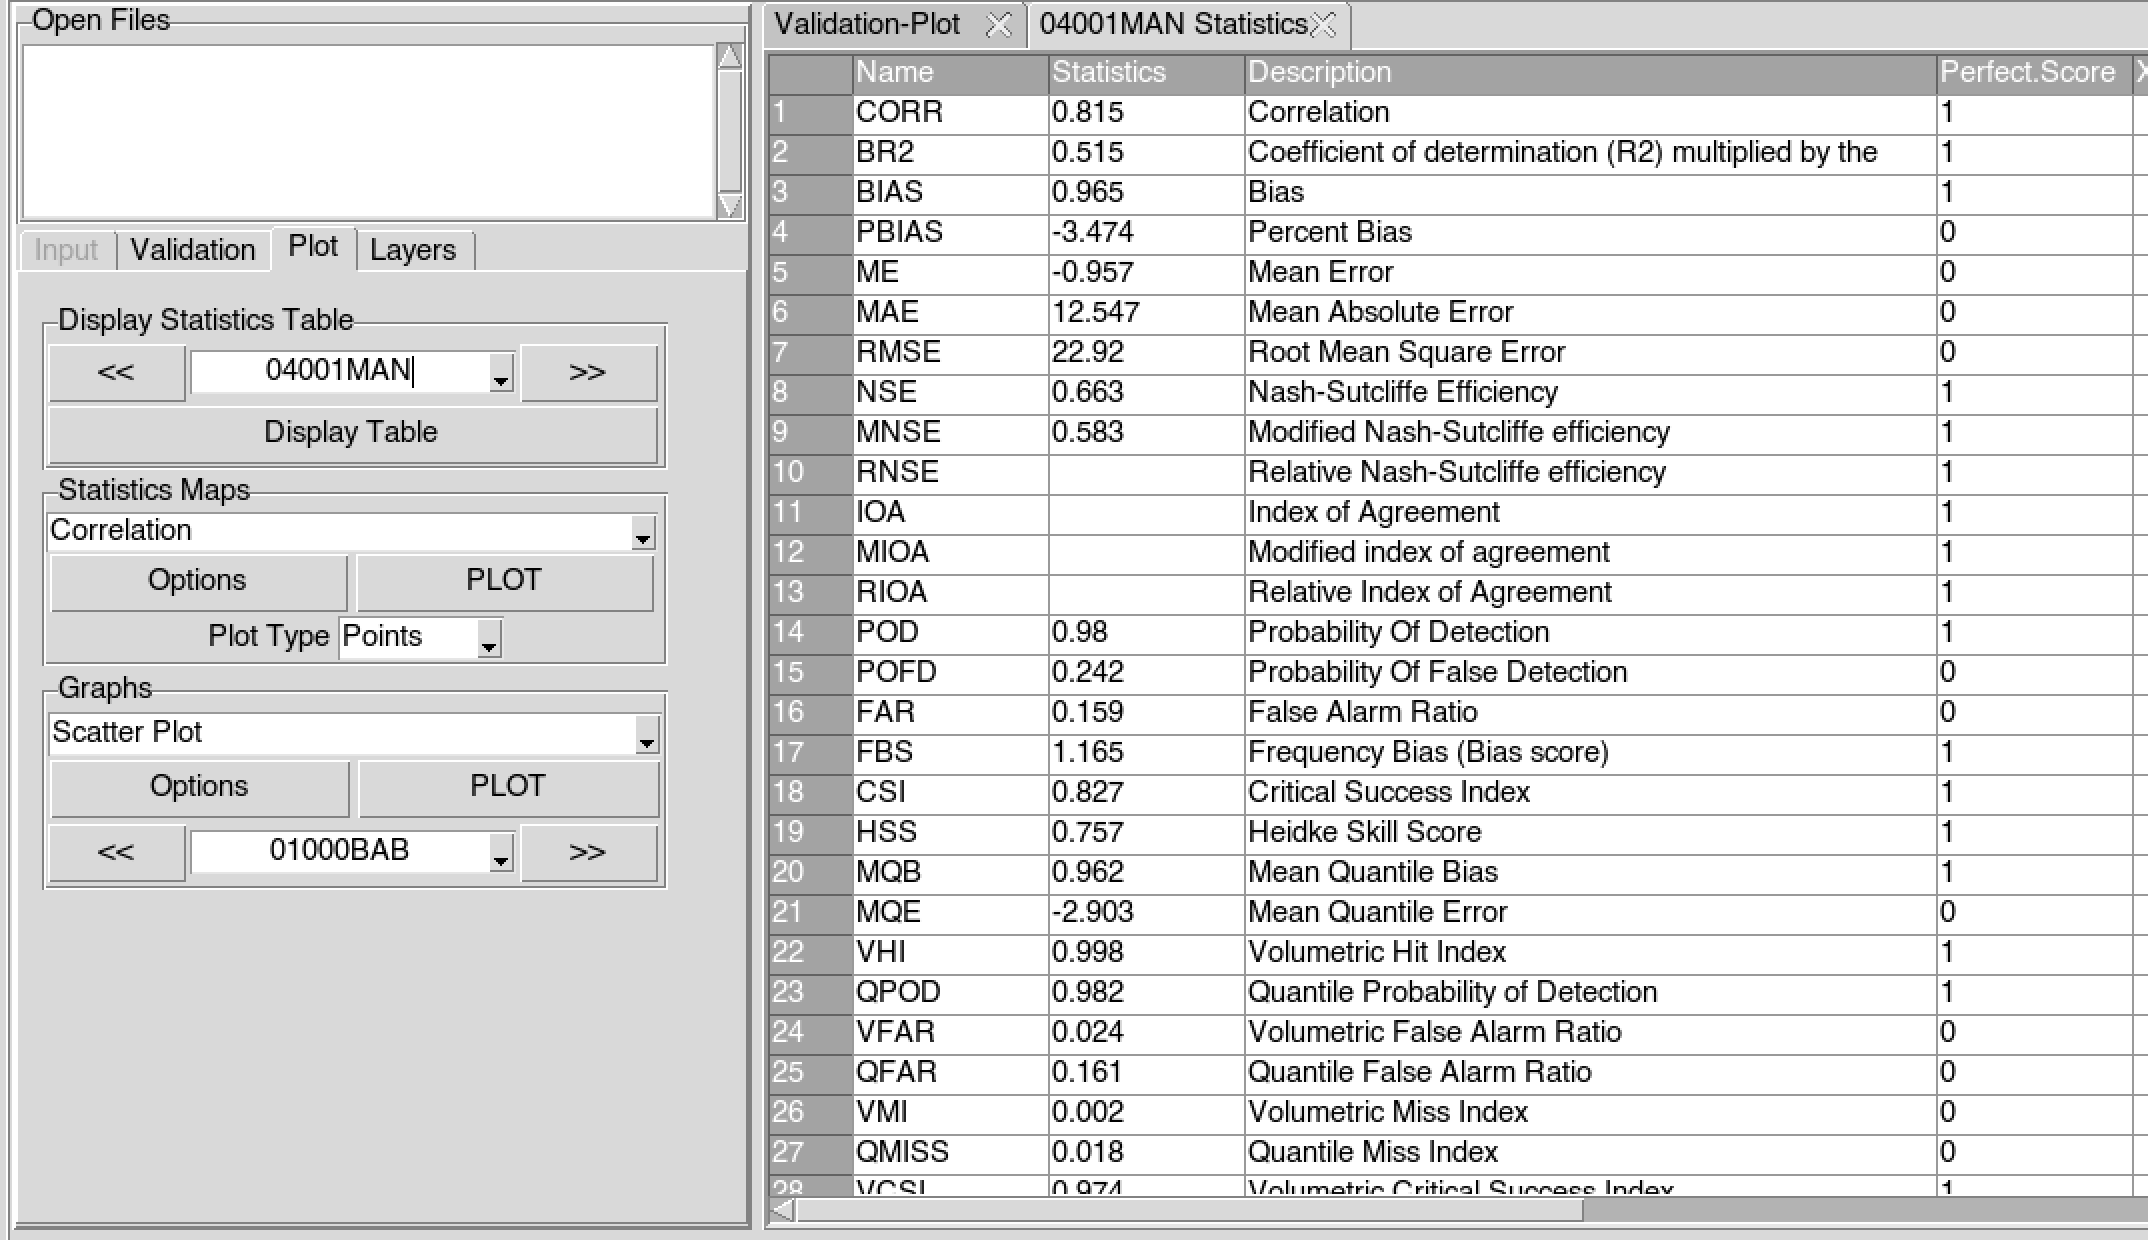
- The frame Display Statistics Table allows you to display the statistics table of the selected the station. Select the station you want to display the statistics table from the drop down list, then click on the button to display table on the left panel. You can also use the buttons and to navigate through the stations, these 2 buttons directly display the statistics table of the selected station. The title of the tab on the left panel shows the ID or name of the stations whose statistics table is displayed, the format of the title is <station ID> Statistics.
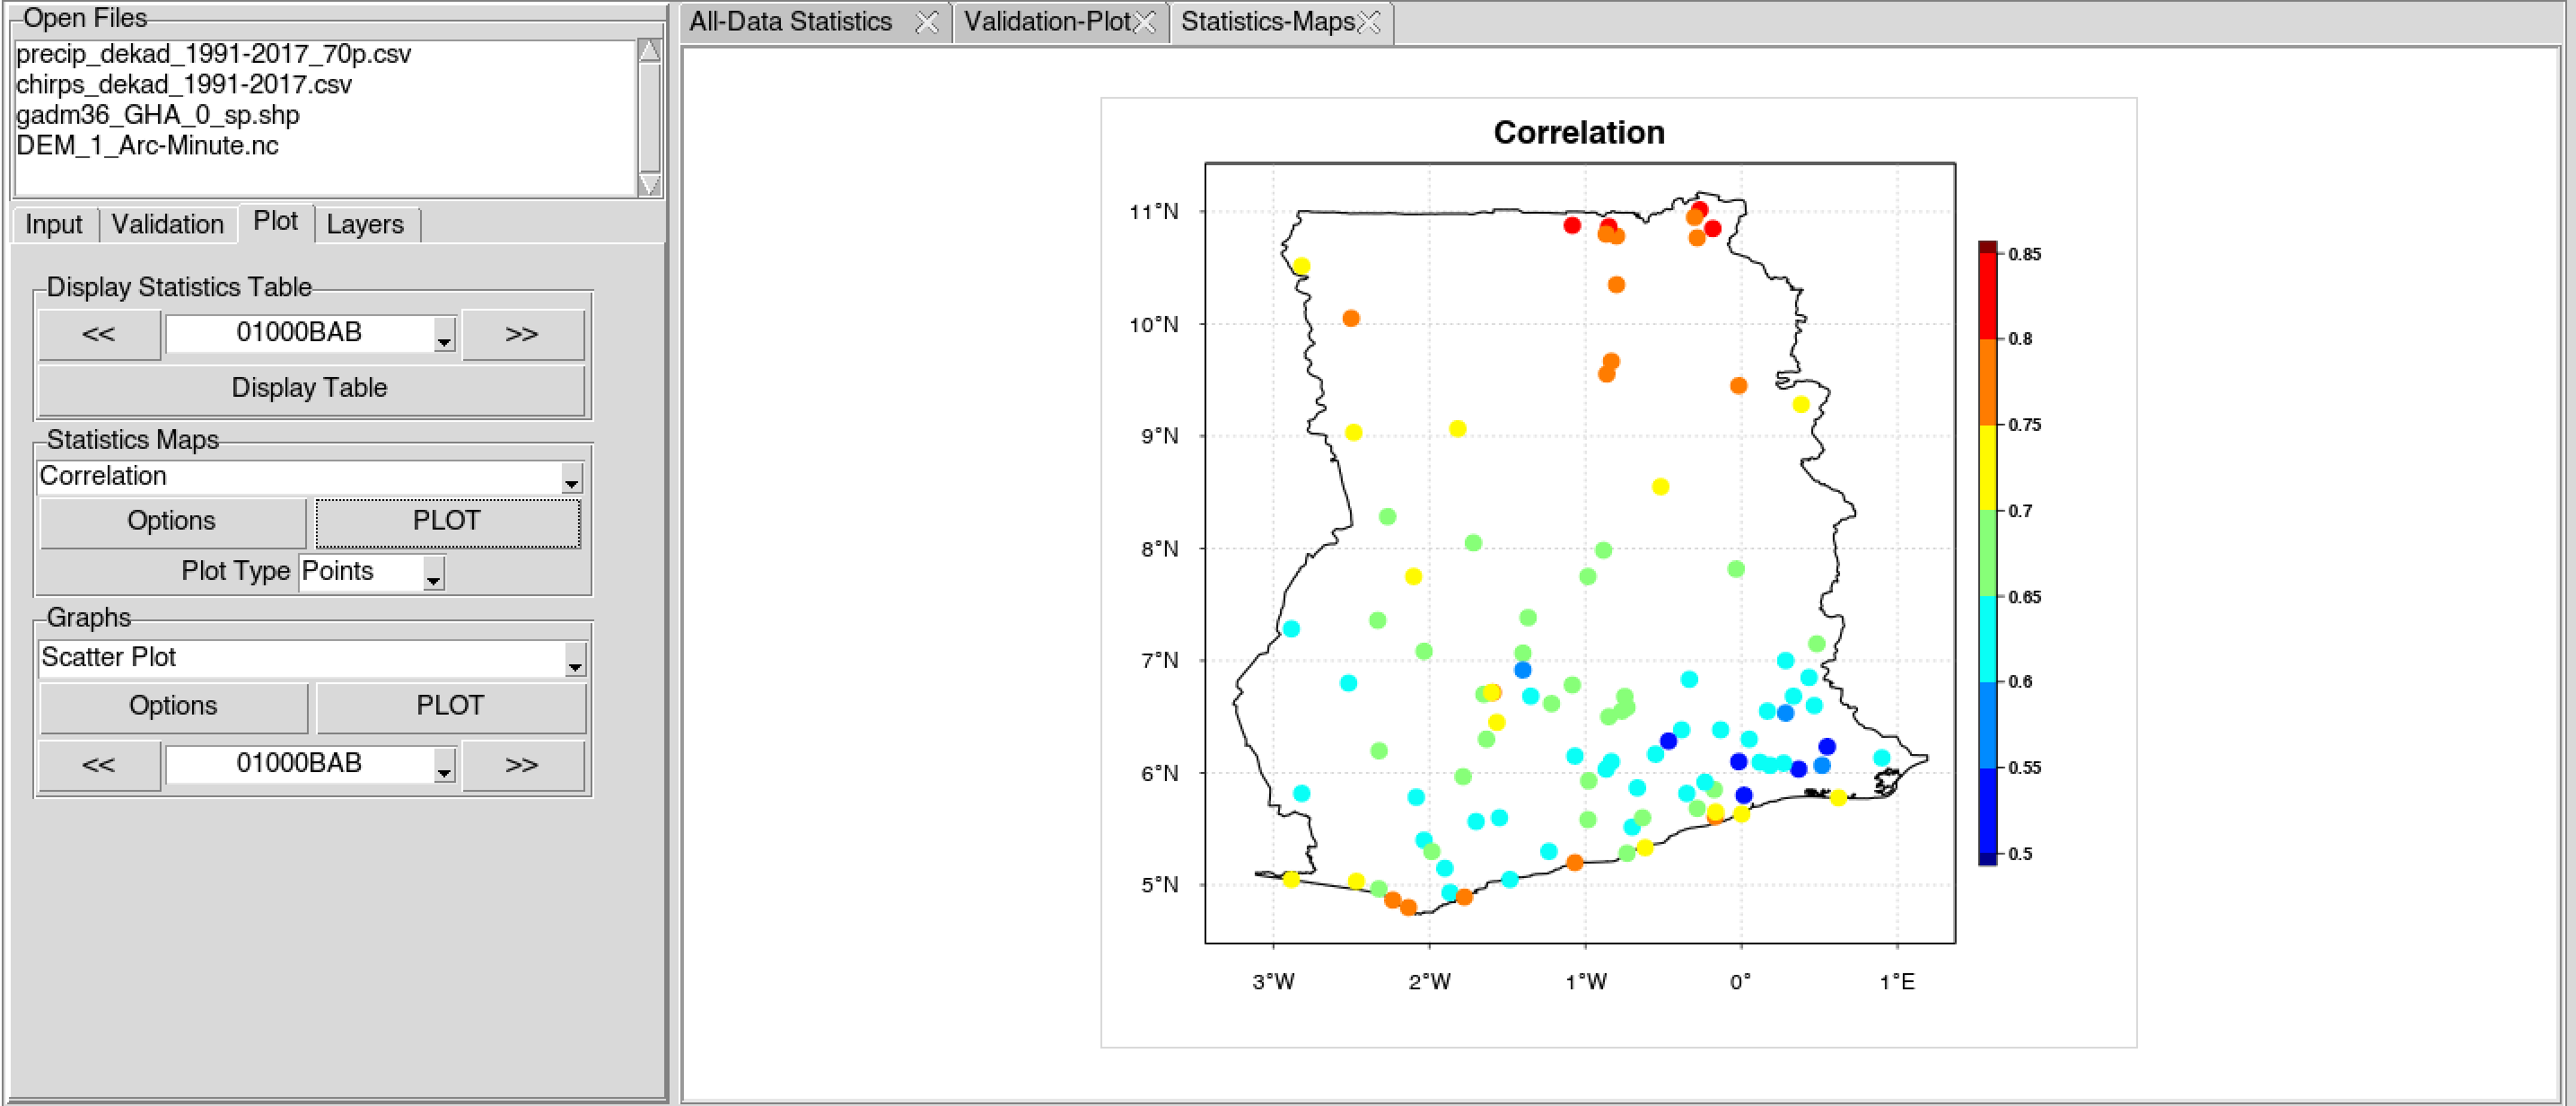
- The frame Statistics Maps allows you to display the map of the statistics. Select the statistic you want to plot from the drop down list, then click on button to display it on the right panel. Select the plot type Points or Pixels you want to render the plot, see stations plot type for more details. Click on button to modify the map, see map options for more details.
- The frame Graphs allows you to display a scatter plot, CDF curve and line chart of each station. Select from the drop down list the type of graph to display, select the station you want to display the graph from the drop down list below, then click on the button to display the graph on the right panel. You can also use the buttons and to navigate through the stations, these 2 buttons directly display the graph of the selected station. Click on the button to modify the properties of the graph. The options dialog box for Scatter Plot can be found here, and for Cumulative Distribution Function and Line chart options dialog box are here.
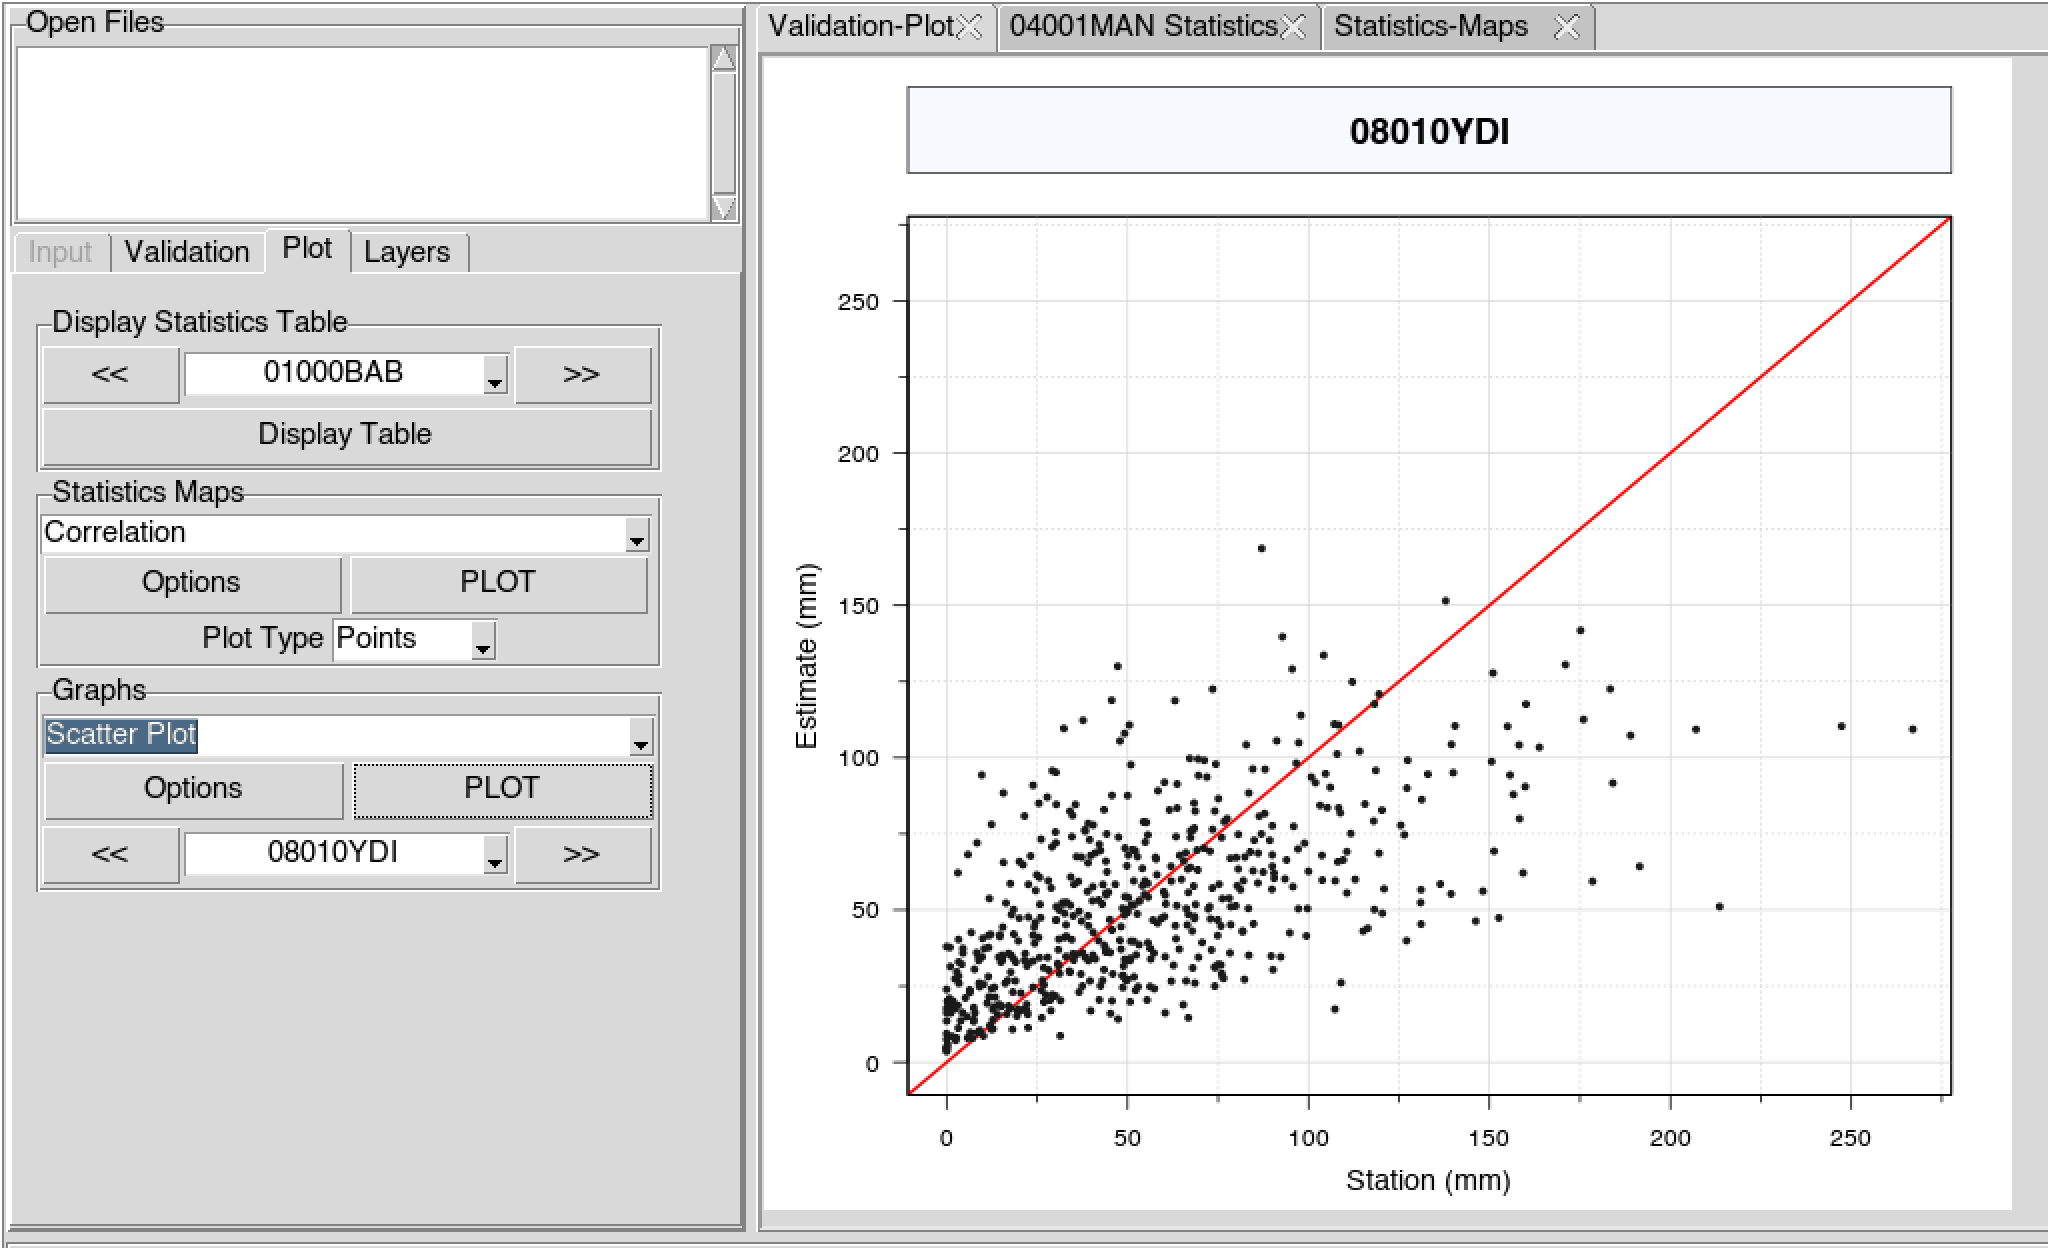
Scatter plot
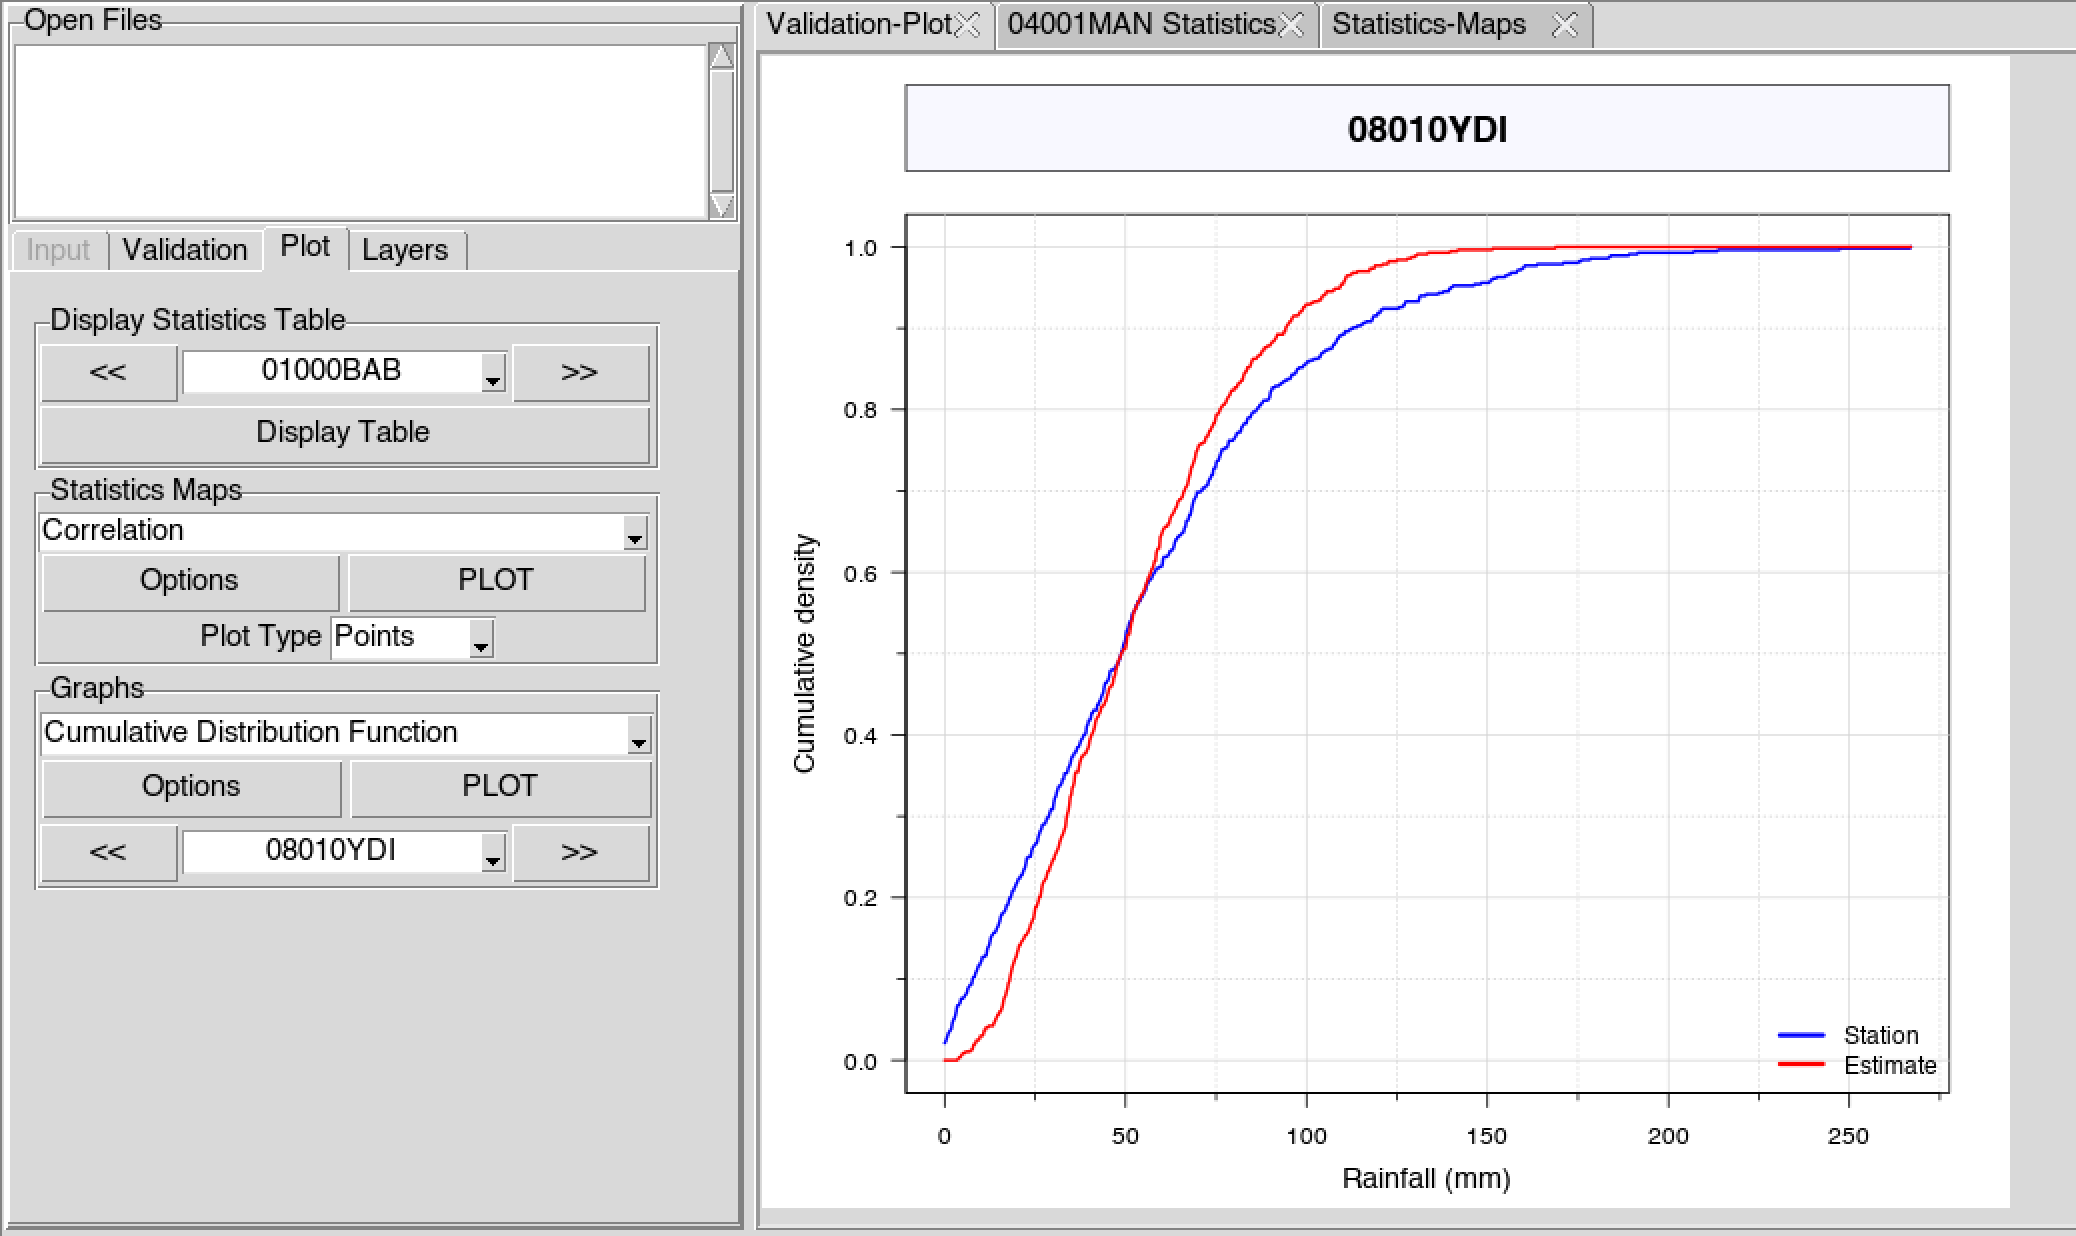
Cumulative distribution function curve
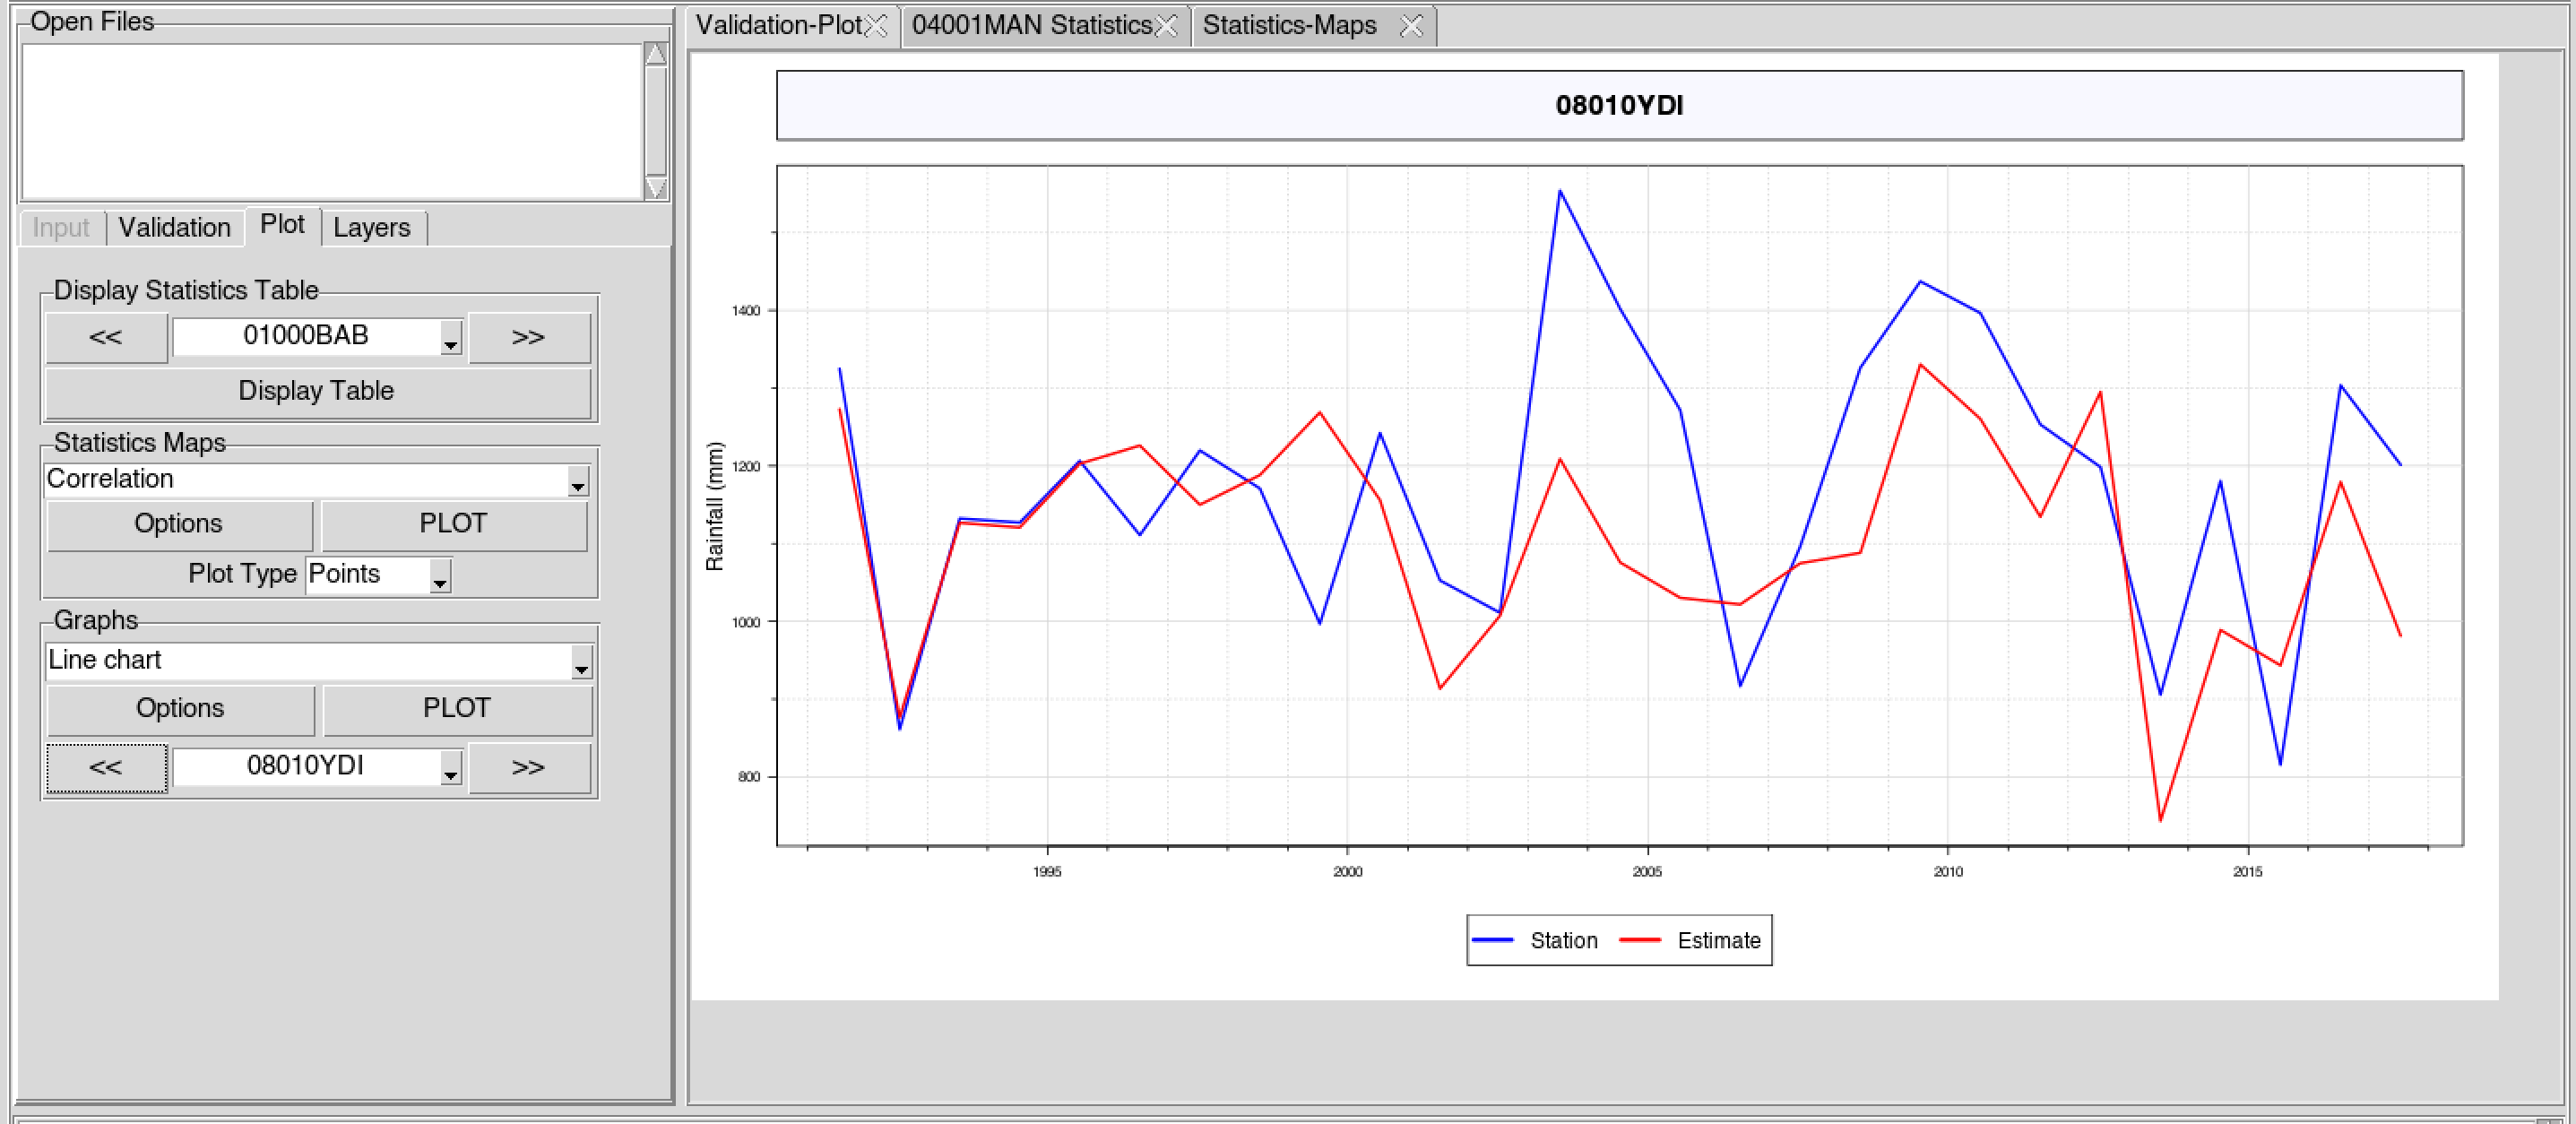
Line chart
The tab Layers allows to add a
shapefile and a gridded elevation data over the map.
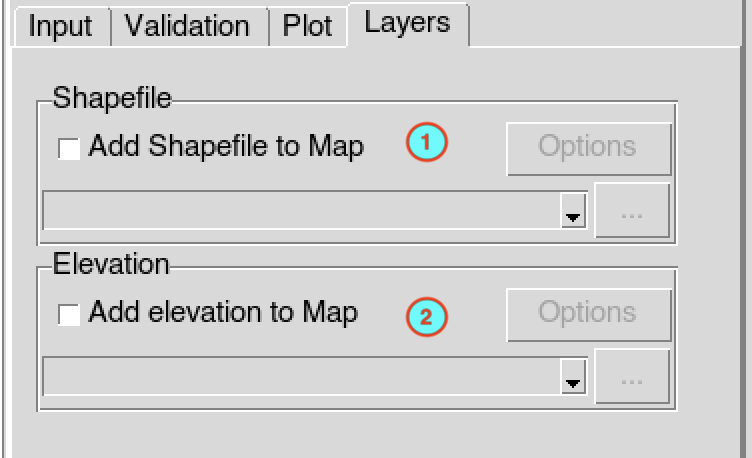
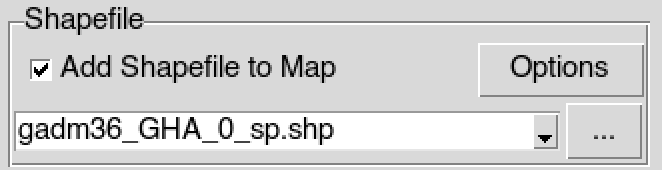
- Check the box
Add Shapefile to Map inside to
overlay a shapefile into the map of the statistics. The drop down list
and the options button inside the frame Shapefile will be
activated. Select the shapefile from the drop down list or open it from
the browse button
on the right. Click on the button to change the color and width of the boundaries lines, see
shapefile layer
options.
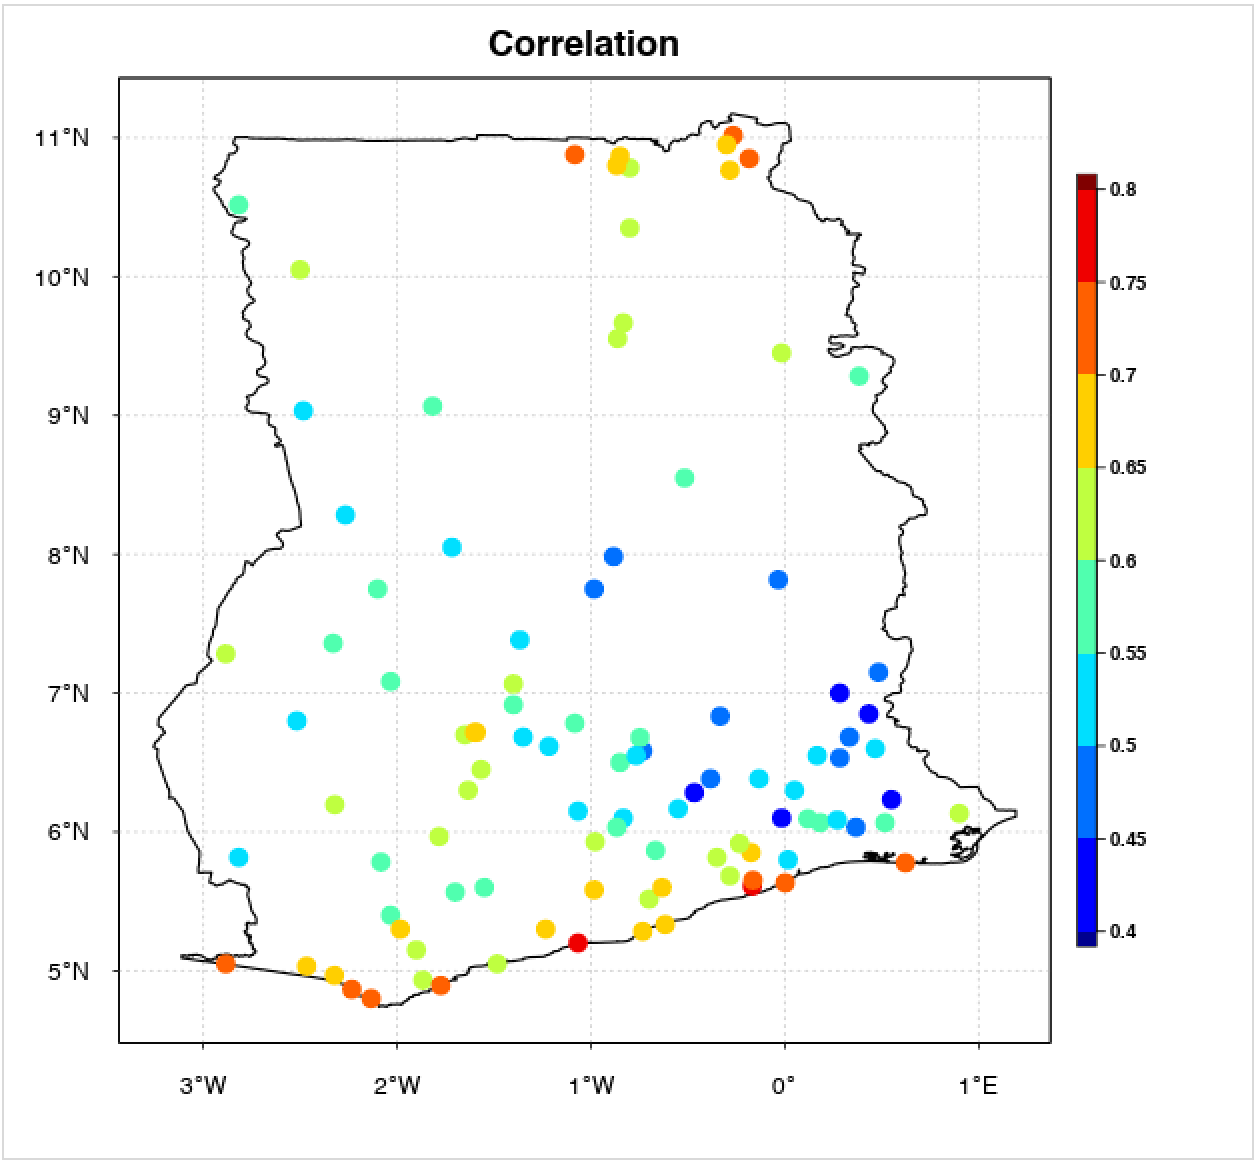
Map of the correlation statistics with a shapefile added
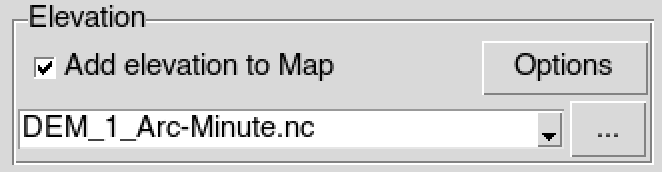
- To add a gridded elevation data (Digital Elevation Model), check the
box
Add elevation to Map inside
the frame Elevation, the corresponding drop down list and
options button will be activated. Select the netCDF file containing the
gridded elevation data from the drop down list or open it from the
browse button
on the right. Click on the button to change color key and the levels to be used. See the elevation map options
on how to change the default options.
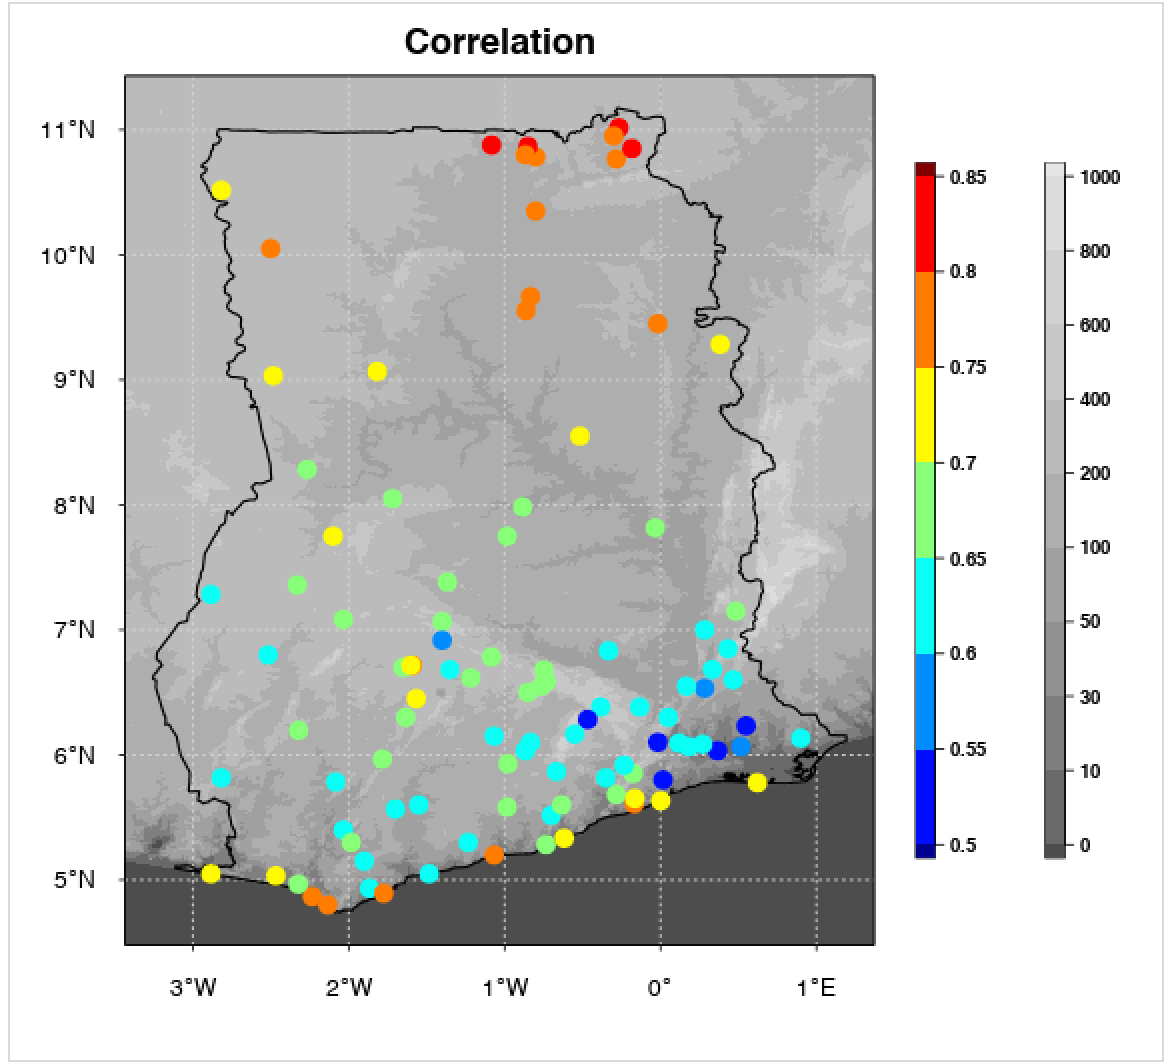
Map of the correlation statistics displayed with the elevation data