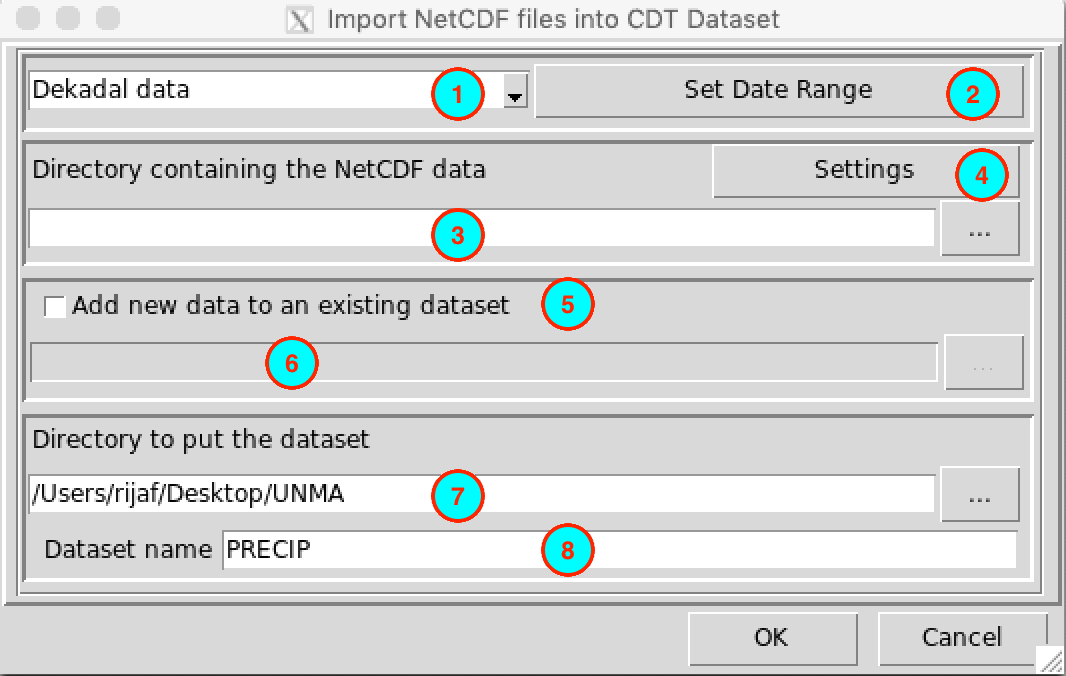
Transforming NetCDF files into CDT Dataset
The menu allows to transform a netCDF dataset into CDT Gridded dataset format. See CDT dataset format for more details.

Select the temporal resolution of the input netCDF data. Available temporal resolution are: daily, pentad, dekadal and monthly data.
Set the date range of the data to be converted. See Setting date range for more details.
Type the full path to the folder containing the NetCDF files or browse it from the button
 on the
right.
on the
right.Provide a sample and change the filename format of the NetCDF file by clicking on the button (see Setting NetCDF data for more details).
If you already have a CDT dataset format and you want to add a new data, check this box.
If the box in (5) is cheked, type here the full path to the index file of the CDT dataset or browse it from the button
 on the right. The index file is in
the form <Dataset name.rds>, see below for an
example.
on the right. The index file is in
the form <Dataset name.rds>, see below for an
example.Type the full path to the folder to save the CDT dataset, or use the browse button
 .
.Specify the name of the dataset.
Click on the button  to
execute.
A folder with the name of the CDT dataset (8) is created under the folder you provided (7). If the name of the CDT dataset is PRECIP, the directory tree structure of this CDT dataset would be as follows
PRECIP
├── DATA
│   ├── 1.rds
│   ├── 2.rds
│   ├── 3.rds
│   ├── 4.rds
│   └── ...
│
└── PRECIP.rds
PRECIP.rds is the index file.
By default, the number of grid/pixels per chunk is set to 100. You can change the parameters of the chunk for CDT dataset through the menu CDT Configurations under the tab CDT Dataset .