Merging Data
Climate data
The menu allows to merge stations observation data with gridded data, where <name of the climate variable > is one of rainfall, temperature, relative humidity, radiation and pressure data.
The tab Input Data allows to
specify the input station and gridded data, the period over which the
data will be merged and the folder to save the output.

Select the temporal resolution of the data. Available temporal resolution are: daily, pentad, dekadal and monthly data.
Set the start and end date of the period over which the data will be merged. See setting date range for more details.
Select the file containing the station data (in CDT station data format) to use from the drop down list if it is already loaded, or open it through
 .
.Type the full path to the folder containing the netCDF files or browse it from the button
on the
right.Provide a netCDF sample file and change the filename format of the netCDF file through the netCDF settings dialog by clicking on the button.
Type the full path to the folder to save the merged data, or use the browse button
.Specify the netCDF filename format of the output merged files.
The tab Merging Parameters
allows to select the method and set all the parameters for the
merging.
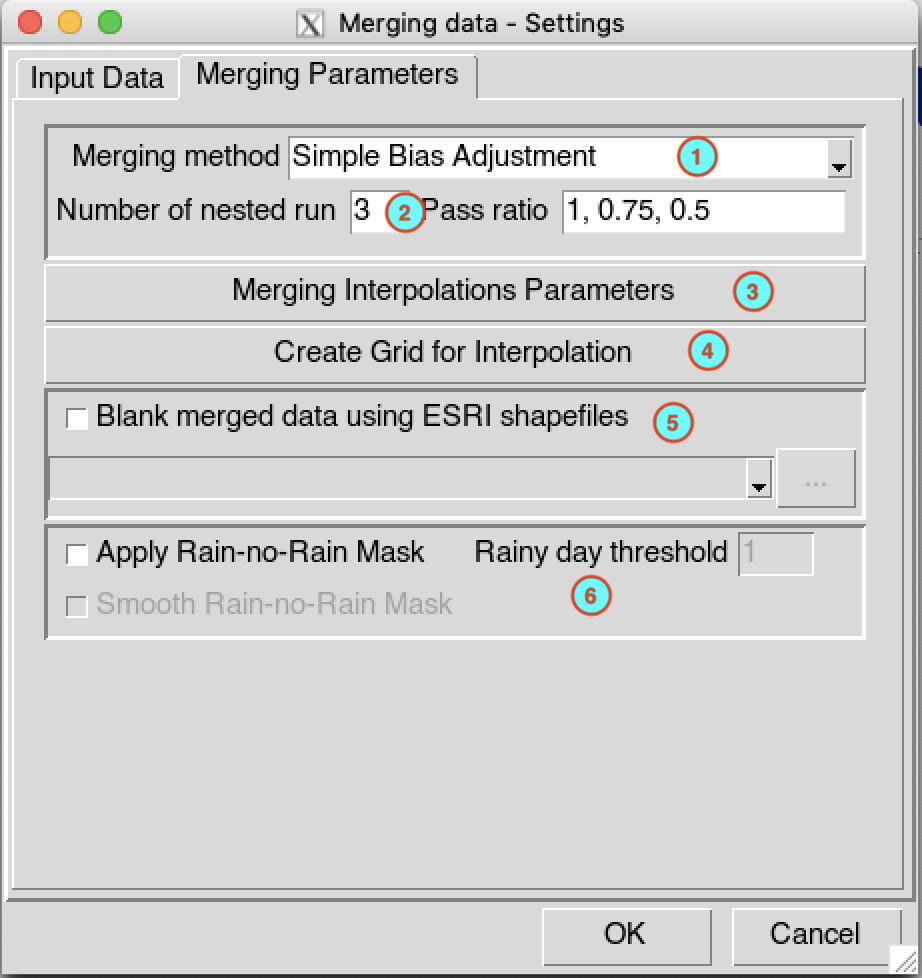
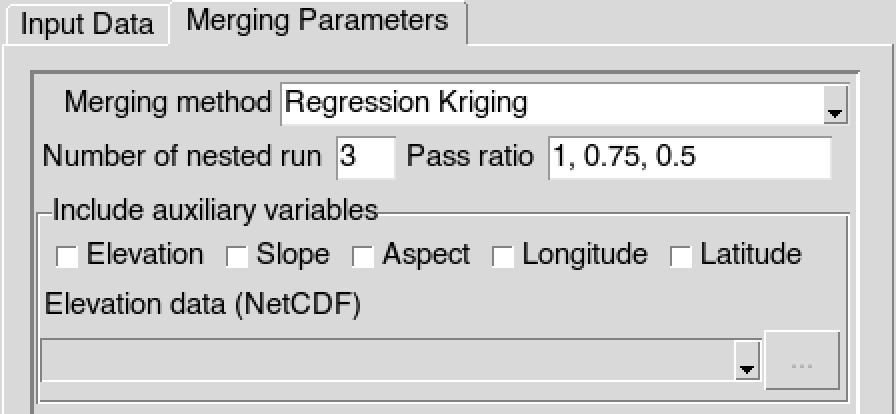
Select the method to use to merge the data. CDT has 4 methods to compute the bias coefficients: Simple Bias Adjustment, Regression Kriging, Cressman Scheme and Barnes Scheme. See CDT merging methods page for more information.
In case of Regression Kriging, you have to provide the auxiliaries variables to be used. An frame is displayed allowing you to select the variables to use. You can use one or more auxiliaries variables. Available choices are elevation, slope, aspect, longitude and latitude data. You include one of the elevation, slope or aspect data as auxiliary variable, you will need to provide the elevation data (in netCDF format). The slope and aspect are computed from the digital elevation model you provided.
Specify the number of nested run to be performed, then edit the pass ratio for each run separated by comma. The number of run must be equal to the length of the pass ratio. Refer to the CDT merging nested run page for more information
Click on the button to open the interpolation dialog to select the interpolation method to be used and set the all parameters for the interpolation.
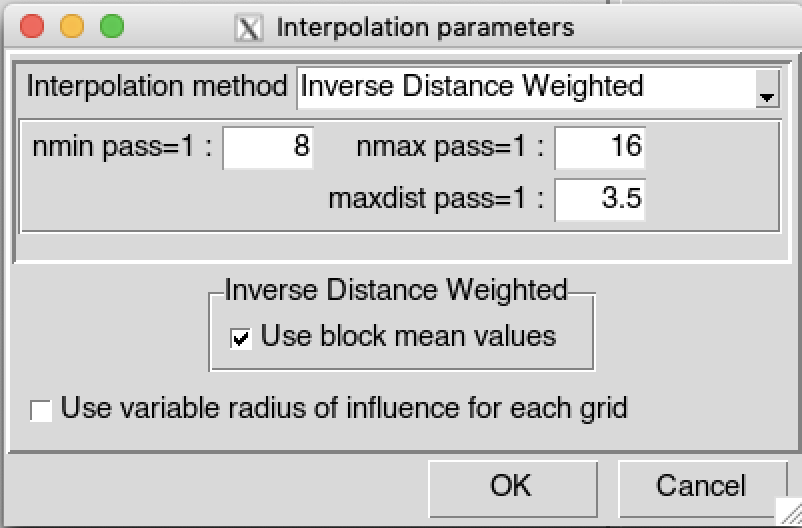
By default, CDT uses a fixed search radius defined by maxdist, which means that all the stations used to interpolate a grid node are selected within a radius maxdist. CDT can allow you to select the stations used to interpolate a grid node by only providing nmin and nmax; this implies that maxdist is variable, maxdist is small over the region with high density of station and becomes large over the region with sparse stations. Check
 Use variable radius of influence for each
grid to use non fixed maxdist. See variable search radius
for more details.
Use variable radius of influence for each
grid to use non fixed maxdist. See variable search radius
for more details.Click on the button to create the grid to be used to interpolate the data. It will display the grid creation dialog.
Check
Blank merged data using ESRI shapefiles
box to mask the grid outside of polygons (blanking) from an
ESRI shapefile. Before executing the merging process, set the options on
how to add or remove the buffer outside the polygons used to mask the
grid. See blanking options for more
details.In case of rainfall data, check
Apply Rain-no-Rain Mask box to
create a mask over the region there is no observed rain from the
stations. See the method used for the application of a rain-no-rain
mask for more details. Specify the threshold to define a no rain
value, a binary data will be created to create the mask, when the
rainfall is below this threshold it will be set to zero and one above
the threshold. To prevent a steep gradient in the interpolated mask,
check
Smooth Rain-no-Rain Mask box
to apply a spatial smoothing in the interpolated mask.
Before running the merging process, change the merging options, if
it’s not done yet, using the function merging.options().
You can change the minimum number of stations to use to perform the
merging, the regression kriging or fit the variogram if you use ordinary
kriging for the interpolation. You also can change the size of the block
to use for the spatial smoothing. The values by default of the function
merging.options() are as follows
merging.options()## $mrgMinNumberSTN
## [1] 10
##
## $rkMinNumberSTN
## [1] 20
##
## $vgmMinNumberSTN
## [1] 20
##
## $useLocalInterpolation
## [1] TRUE
##
## $powerWeightIDW
## [1] 2
##
## $powerWeightShepard
## [1] 0.7
##
## $powerWeightBarnes
## [1] 0.5
##
## $addCoarseGrid
## [1] TRUE
##
## $resCoarseGrid
## [1] 0.5
##
## $saveGridBuffer
## [1] FALSE
##
## $dirGridBuffer
## [1] "/Users/rijaf"
##
## $saveRnoR
## [1] FALSE
##
## $dirRnoR
## [1] "/Users/rijaf"
##
## $RnoRModel
## [1] "logit"
##
## $RnoRCutOff
## [1] 3
##
## $RnoRaddCoarse
## [1] TRUE
##
## $RnoRUseMerged
## [1] FALSE
##
## $RnoRSmoothingPixels
## [1] 2
##
## $blockType
## [1] "gaussian"
##
## $blockSize
## [1] 1 1Type into the R console the following command to get help on the available arguments of this function
?merging.options
Click on the button  to
start the merging.
to
start the merging.
A folder named MERGED_<name of climate variable>_Data_<start date>_<end date> will be created under the folder you provided to save the outputs. It contains the netCDF files of the merged data and a log file.
Wind data
The menu allows to merge wind data from stations with gridded data.
The tab Input Data allows to
specify the input station and gridded data, the period over which the
data will be merged and the folder to save the output.

Select the temporal resolution of the data. Available temporal resolution are: daily, pentad, dekadal and monthly data.
Set the start and end date of the period over which the data will be merged. See setting date range for more details.
Select the wind variables to be used: wind Speed only or the U and V components of the wind data.
If the wind speed is selected in (3), provide the file containing the wind speed data (in CDT station data format) to use. In case of U and V components, you have to provide the files containing the station data for U-component and V-component of the wind data (in CDT station data format). You can select the files from the drop down list if it is already loaded, or open it through
.
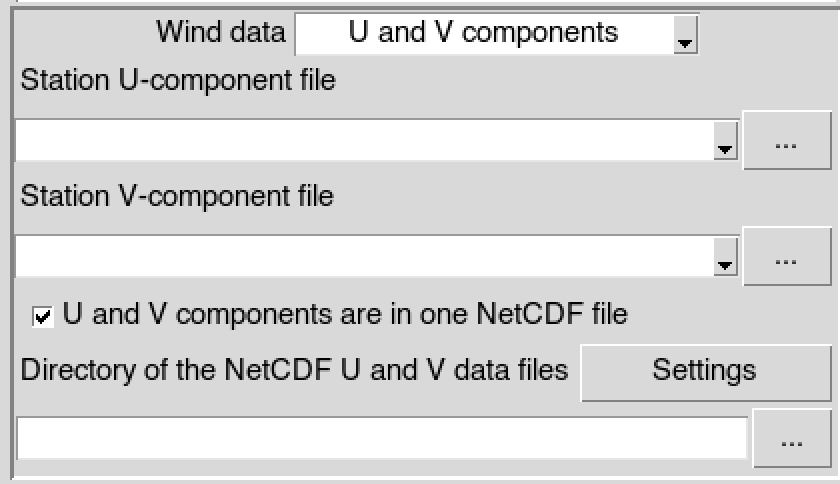
- If the wind speed is selected in
(3), type the full path to the folder containing the
netCDF files or browse it from the button on the right. In case of
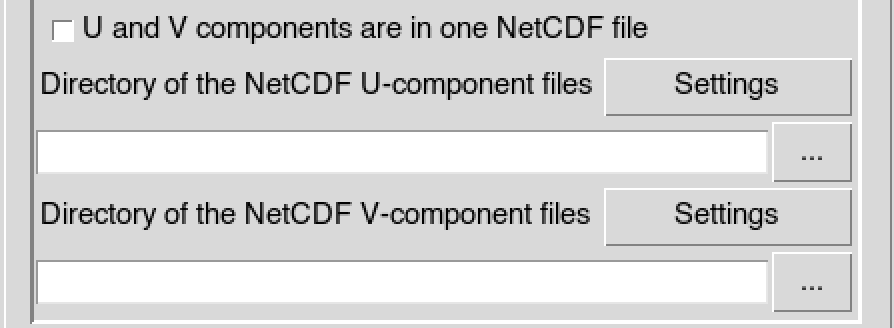
U and V components, provide the full path to
the folder containing the netCDF wind data files; if the U and V
components are stored in separate files, uncheck
U and V components are in one NetCDF file
and provide the full paths to the folder containing the
netCDF U-component and V-component files.
Provide a netCDF sample file and change the filename format of the netCDF file through the netCDF settings dialog by clicking on the button.
Type the full path to the folder to save the merged data, or use the browse button
.Specify the netCDF filename format of the output files. In case of U and V components stored in different files, specify the netCDF filename format for each component.

All the parameters for the merging in the tab
Merging Parameters are the same as the other climate
variables described above.
After setting all the required parameters and changing the merging
options from the function merging.options, if any, click on
the button to
start the merging process.
A folder named MERGED_Wind_Data_<start
date>_<end date> will
be created under the folder you provided to save the outputs. It
contains the netCDF files of the merged data and a log file.